Showing posts with label expressive language. Show all posts

Wednesday, October 23, 2013

Product Review: Pirate Talk by Super Duper

Oh that red box! Who doesn't love coming home to find one of these at their door?


When the nice folks at Super Duper contacted me about reviewing one of their products, I was happy to do so!  First, I'd be foolish to say no to an awesome product from Super Duper (yes I knew it would be awesome before even opening the box!). Second, I love getting new materials for my kids.  Third, I know many of you look to bloggers like me to find how what we really think of products and apps!  Here's what was in the box:


The Details:

Pirate Talk: Receptive & Expressive Language Game.
Created by: Sarah Michaels and the Super Duper Staff.
Grade Level: K-5
Description (from Super Duper's website):  Your students are about to embark on a swashbuckling adventure as they sail the high seas with Pirate Talk, the receptive and expressive language skills game! As students respond to each prompt, they move from island to island on the colorful game board and collect gold coins. The prompts reinforce seven essential communication skills:  Sentence Repetition, Answering Questions, Following Directions, Categorizing, Inferencing, Describing, and Social Skills.
Includes:  Game Board, 150 Color-Coded Receptive and Expressive Language Cards(5 subject areas, 30 cards each), Instruction Sheet, 6 Pirate Player Pieces, 100 Gold Coins, and Electronic Spinner (1–3)


A Closer Look:

My son has learned that a box at the door equals something fun.  So when we came home, he begged me to open this one right away!  We opened the box, took out the game board, and checked out the other items:

Notice M's foot anxiously waiting to play!
I skimmed the directions because I prefer games that allow you to fly by the seat of your pants.  I believe that if the directions are too long and complicated, the kids won't want to play the game.  Am I right?  Anywhoo...you can see that the game comes with basic directions and game variations!  This is great for changing things up and using the same materials for multiple sessions, but in new and exciting ways!


After that, I organized the cards.  I think it's a personality requirement for SLPs to love organization and clearly Super Duper is a company of SLPs! The box has a tray that holds your cards and the cards come color coded and with dividers:


The cards have different scenes on the front.  The scenes depict scenarios from 5 different categories:  activities, community, home, school, and people.  Here's a sample card from the "activities" section:


Super Duper really does have great illustrations, don't they?  On the back of each card are the prompts for each target area: Sentence Repetition, Answering Questions, Following Directions, Categorizing, Inferencing, Describing, and Social Skills. I found that we could use the pictures as conversation starters as well.

Notice that some cards allow children to earn "bonus" coins!

Instead of dice, Pirate Talk comes with an electronic game spinner! How cool is this?!? I love that you only have the option of spinning a 1, 2, or 3 and I may just have to use this with other games as well!  The kids loved pushing a button instead of rolling a game die and NOTHING fell on the floor!! :)


What may just be the best part of this game is that it comes with 100 gold coins! I didn't count them, I'm going to take Super Duper's word for it!  Boys and girls were thrilled to play this game and to earn these shiny coins!


Trying it Out:

My son was in love with the game and didn't really want me to bring it to work.  Once he got over that, I brought it to school and tried it out with my kids.  I used it with kids in Preschool and in Second Grade.  We played the traditional version, nothing fancy.  The kids LOVED it! I loved that I could use it in a mixed group and target different objectives with the same cards!  I did find that with larger groups of kids, we weren't able to "finish" the game by returning our pirates back to their home bases, but none of the kids minded. They were happy to count their coins to find the winner.  If you're wondering, 2nd grade loved it as much as the preschoolers.


Bonus Activity:

My super-observant friend Stephanie was quick to make this observation...There are 100 gold coins. New information suggests aiming for 100 articulation trials/session.  See where I'm going with this?  You can use the coins for motivation in an Articulation Challenge!


I made a quick "bank" out of a butter tub, but how much fun would it be to use a treasure chest piggy bank!?!?


The Take-Away:

Pros:

  • As a receptive/expressive language game, Pirate Talk has it all.  You can look at a picture scene and ask each type of question, in addition to targeting inferencing and pragmatics.
  • Versatility!  The game cards themselves make Pirate Talk versatile, but the adaptability of the game goes beyond that. (See description below)
  • Fun! Who doesn't love a pirate theme?!?
  • The description on the box says that this game is for Grades K-5, but the box itself says that you can use it with Grades K and up or Ages 4-10.  

Cons:

  • I can't think of a single one!


The Bottom Line:
Pirate talk is a fun, engaging addition to your therapy supply closet.  According to the game's description, you can use it to target 7 areas of communication. However, I have found that you can use it for so much more than that!  The game board can be used for an open-ended activity, the spinner can be used to make your game boards (like those from TPT) more fun, and the gold coins can be used to get 100 trials during Articulation Burst therapy!

If you have Pirate Talk, what's your favorite game variation?  If not, what's your favorite product from Super Duper?


Tuesday, August 6, 2013

Letterboxing, Part 2 (Incorporating into Speech/Language Therapy)

Warning:  This post will make a lot more sense if you have already read my post Letterboxing, Part 1. :)

Yesterday I shared a little bit about Letterboxing with you.  As soon as I heard of this activity, I knew it could have amazing applications in speech and language therapy sessions.  However, most of us can't just take our kids on scavenger hunts all over town...I mean, that would likely take WAY more than the standard 30 minute speech session would allow!  So, how can you incorporate Letterboxing into your therapy sessions?  Easily!  Instead of having your students Find Letterboxes, have them Plant one!


Think about it...every Letterbox out there was put in its location by someone.  Each of the clues on the site were written by someone!  Why not you and your students?  Public schools are, by definition, on public property.  You could plant a Letterbox without even leaving school grounds!  Also, have you checked out some of the clues?  They range from really simple (Go to X location. Look for Y landmark. Find Letterbox) to complex.  Some include a history of the location, some are elaborate fictional stories about the location, and some take you to on (what feels like) an expedition!

Planting a Letterbox in Speech:

  • First of all, I recommend this activity for grades 3 and up.  However, once you have planted the letterbox, you can go "find it" with some of your younger groups.  
  • You may also wish to get permission from your principal. Once you get the OK...
  • Explain Letterboxing to your kids.  You could even stage a mock indoor letterbox for your students to find so they get the idea. 
  • Take your sessions outside and decide on a location.  You can even do this with multiple different groups and then have the students vote on their favorite location.
  • Create your box.  You can view the Letterboxing website for some information on planting clues. I recommend a box that you know will be air/water tight and putting the items in a Ziploc bag within the box.  
  • Decide how much information you want your students to include in the clues.  (This may vary between groups.)  Some ideas:  a brief history of the school, students's favorite things about the school, a short bio on the person for whom the school is named, etc.  Help the students research and start writing the information you decided to include, as well as the clues to get to the box location.
  • Do a walk-through of the clues with the students.  Follow the directions as literally as possible.  This will help the students see which directions may need to be clarified.
  • Once your clues are completed, plant the box and upload your information to the Letterboxing website.  You may want to check your box once in a while to see whether or not you've had visitors.
  • Use the clues with your other groups, especially those that are working on auditory comprehension and following directions!  


You can target so many goals by planting a Letterbox (expressive language, receptive language, giving directions, following directions, written language, carryover of any skill, etc., etc., etc.)!  Do you think you could plant a Letterbox with your students?

Monday, July 22, 2013

App Review & Giveaway: Describe it to Me

I'm so excited to bring you some info on the latest app by Smarty Ears Apps - Describe It To Me.  This app, like all of those developed by Smarty Ears, was designed by a certified speech-language pathologist. The coolest thing about this app is that it uses a game show format to build receptive and expressive language skills.  The app description states that Describe it To Me is "designed to help clients build a deeper understanding of everyday items."  But you can do so much more with this app than that! (More on that later.)


Getting Started:
Before we start, I wanted to share a few features that are available from the home screen.  Support: This button allows you to watch a video tutorial on using the app, view a description of the app, backup/restore the app, and email Smarty Ears for support.  More Apps:  View more of the apps available from Smarty Ears.  Report Center:  This is where you can go to view the data from your Describe it to Me sessions.


When you're ready to begin, tap Play.  You will need to add a player to begin.  You can manually add a player or import players from Therapy Report Center. When you add a player, you can choose to import a photo (from the camera or photo roll) or use one of the many built-in avatars.  The screenshot below shows you an example of both an avatar and photo icon.


From this screen, you can also adjust the settings for the app.  You can choose what happens when the student is incorrect (buzz or remove the item), choose visual/auditory reinforcement, choose whether or not to display points, and choose whether or not to use a spinner.  From this screen, you can also customize the word list (below) by selecting/deselecting words (below). For example, if you are using with younger kids, you might want to keep the vocabulary more simple.


Using the App:
Once you have your players added/selected and your settings selected, you are ready to begin.  You can use this app with up to five players. The players will be displayed on the spinner.  The target word/object is displayed on the television screen and the question type is displayed above the screen.  You can change the target word by pressing the forward/reverse buttons on the side of the screen and switch from receptive/expressive targets by sliding the button to R/L.  Change students by tapping the avatar of the desired player.


Receptive:
In the receptive mode, the student is given questions about the object with four possible answers.  There are six questions for each item (located along the top of the TV screen).  These can be changed by sliding the indicator icon.  The questions are related to:

Category:


Function:


Parts:


Location:


Visuals:


Extra:


I used the same object for each question type so you could get an idea of the question asked.  The questions are generally the same for each object.


Expressive:
For the expressive component, the same six question types are present and the questions that are asked are the same as in the receptive component.  However, in expressive mode, the student must respond verbally.  You can score a student's responses by tapping Correct/Almost/Incorrect.


Reports:
When you're finished with your session, tap DONE.  As with most Smarty Ears apps, Describe it to Me has built in data collection and will generate reports based on your sessions.  You may view/email these reports, or export to Therapy Report Center.


Reinforcement:
Describe it to Me has a few different types of reinforcement.  First, do you remember the settings?  You could select Visual and/or Auditory Reinforcement.  The visual is shown below.  The auditory is a sound that occurs when the student gets the item correct.


In addition, Describe it to Me provides rewards whenever a child gets 10 correct answers in a row:


These rewards will be stored in the player profile of the app.


Homework:
Describe it to Me has built in homework sheets that you can email to a parent or email to yourself for printing.  We all know that carryover is essential and what better way to promote carryover than home practice!


Eliminate 1:


Circle 3:


And that's Describe it to Me!  Here's what I think:

The Pros:
  • I've often used a "Describing Hierarchy" in my therapy sessions that is somewhat similar to the question prompts in this app.  I've found using an approach like this to be helpful for students with word retrieval difficulties.
  • Receptive/Expressive components in the same app!  We all have mixed groups, right?  This app makes working with mixed groups easy!
  • The app description says that is was designed to be used to build a deeper understanding of everyday items.  It really can be used for so much more:  increasing vocabulary, answering wh- questions, use and comprehension of categories, use and comprehension of attributes, part/whole relationships, object functions, word retrieval, etc.
  • I don't have an EET, but have read up on it a bit.  This app looks like it focuses on similar concepts and can be used in conjunction with EET.
  • I love the built-in home practice sheets! They can easily be shared with teachers or parents for printing.
  • Built in reinforcement and data collection are always big pluses in my book.  Because of the reinforcement and fun game show format, kids may be more motivated to practice skills using the app than without it.

The Cons:
  • I've turned the spinner on.  I've turned the spinner off.  I cannot notice a difference either way.  
  • I would love to be able to record expressive responses.  With that said, I know that adding a recording feature would likely increase both the price and storage space of the app, so I can live without that feature.

The Bottom Line:
Describe it to Me is a great app that can be used to address so many language targets.  This app is fun and motivating for students, not to mention affordable.  Describe it to Me features similar concepts as the EET and is a great addition/companion to the EET.  I cannot wait to try this app with some of my students with word retrieval difficulties because I know it will make a difference!  As of this posting, Describe it to Me is on sale for $4.99 in the App Store.  The regular price of this app is $9.99.  Smarty Ears was kind enough to provide a copy for me to give away today.  To enter, use the Rafflecopter below.


Wednesday, July 17, 2013

Don't Throw it Away! Newspapers

A few years ago, I was working solely in the preschool of a brand new district after working 5 years in early intervention and three years in another preschool program.  Because I was lowest on the seniority pole, I was  a "floater" (meaning I would help to cover if another SLP had to go on an extended leave).  Then I got a phone call that terrified me.  I was going to "float" over to another school to absorb part of another SLP's caseload while she was out on medical leave!  Her caseload consisted of preschool through grade five.  FIVE?!?  YIKES!  After spending so much time with little kids, I really had no idea what I was going to do with the big kids (grades 3-5).  Yes, she left me some ideas, but now that I had kids who could read and write, I wanted to do something really creative!  So, I grabbed a newspaper:

(I've been planning this post for a while now - check out the date!)

During my first session (after the getting-to-know-you stuff), I took out a newspaper.  We talked about the parts (title, headlines, stories captions) and the sections (local, sports, classifieds, etc.).  Then we talked about why a story might be on the front page versus the middle of the second section...why some stories had pictures and others didn't...why people put ads in the classified...and why there are other advertisements in the paper.

In subsequent sessions, we:

  • read articles and answered wh- questions
  • read 2 out of 3 panels of a comic strip and worked on predicting
  • read articles and brainstormed appropriate headlines
  • looked at pictures of people and discussed their emotions
  • and had a newspaper scavenger hunt!

Today I'll be sharing the Newspaper Scavenger Hunt with you!  This was probably the favorite activity for the kids.  I split them into teams and had them work together (great way to incorporate executive functioning skills!) to find different categories of words within the newspaper.


I told students what they would be looking for before they were able to pick a section of the newspaper. I also gave them a few minutes to come up with a strategy before they began. They searched for proper nouns, common nouns, contractions, adjectives, verbs, compound words, a month of the year, and numbers (you may choose to do numerals or number words).  You may wish to pre-teach certain ideas early on in your newspaper unit.  For example, while checking out the sports page, you may mention that football, baseball, basketball are compound words, or you may draw attention to the location of the date within the newspaper.

The kids all got one of these sheets plus pencils.  They were instructed to circle the words they found in the newspaper (so I could make sure they were really finding the words) and to copy the words onto their worksheet.  I have to say, this activity drew out their competitive sides!

One more thing I want to mention, I decided early on that we would write a newspaper for the SLP who was out so that she could know everything important that happened while she was out.  The kids worked together to decide a name for the newspaper.  Each week, I asked them to tell me what happened during the week.  Toward the end, we picked a few topics about which we would write articles.  Once we had topics, we brainstormed key points that we would make about the topics, created sentences for the points, and put them in a logical order.  Then they came up with titles for their articles.  I even brought in my camera so they could include photos.

The kids wrote about picture day and interviewed the school secretary to find out the date and the name of the company.  One of the students was planning on moving the following week, so they interviewed him about where he was moving and how he felt about the move.  They wrote about MCAS (our state wide achievement testing) and a field trip.  Here's one of their articles:

Field Trip
The third and fourth grade went on a field trip to the Zeiterion Theater on March 18th. We went there on a bus. There were other schools at the Zeiterion. We saw a friend who moved to another school and her name is Lakeira. We saw an orchestra playing the violin, drums, strings, flute, tuba, clarinet, and harp. Kaidyn raised his hand to go on the stage and got picked. He played a trumpet and it didn’t work for him because he didn’t do it right. It made a funny noise. We came back from the Zeiterion in time for lunch.

Not bad, right?!?  If you like the idea of using the newspaper in therapy, you'll want to check out Speech Room News for Jenna's Newspaper Companion.  I had the chance to preview the companion and it is awesome!  Now I know exactly what to do if I ever get called to "float" again!  :)

You can download this activity HERE.  Do you use the newspaper in your therapy sessions?  What are your favorite activities?

Thursday, July 11, 2013

Book of the Week: Curious George and the Pizza

Disclaimer:  This post contains affiliate links to Amazon.com for your convenience.


I really love being on summer vacation!  I'm sure I'm not the only one, right?  I've been busy relaxing and having fun with my son, so I've been slacking at writing blog posts.  Sorry about that!  I'm back today with a Book of the Week with one of my favorite books - Curious George and the Pizza!


I stopped by a local pizza place and asked for an empty pizza box:


Before I read the story, I show the kids the box and ask them what they think my story is going to be about. I get that this should be really, really easy, but some of my preschoolers don't guess correctly (!).  Once I get a few guesses, I reveal what's inside the box:


I ask the kids to tell me what's on the pizza and I ask each one what they like on their pizza.  Then I read the story.  A quick summary - George and his friend head out to the pizza restaurant and George gets into a bit of a mess (literally).  One of my favorite things about this book is that it gives a sequence for making a pizza. George also ends up stuck in the back of the pizza truck while the pizza chef is trying to deliver a pizza to a building behind a locked gate.  How is he going to deliver the pizza? There are a few places in this book where you can stop and work on predicting/inferences and this is one of them!

After reading the story, I ask my wh- questions and we sequence the steps of making a pizza.  We act out the steps during and after the story:
  • grab some dough
  • roll it into a ball
  • flatten it like a pancake
  • toss it in the air (catch it!)
  • spread the sauce
  • sprinkle the cheese
  • put it in the oven (and wait!)  

Using the actions paired with the steps makes this activity perfect for preschool and kindergarten.  If they forget the words, cueing with the action generally makes them remember!

Extending the story:
I found this fun game at a local odd-lot type of store.  It is now marketed under a different name - Poppa's Pizza Pile-Up.  It's one of those games where you add something to the top and hope nothing falls down!  I use this game as a basic reinforcement game for my groups.


With some of my groups, we do this pizza craft:


I give each child a paper plate and ask them to remember the steps of making a pizza.  We talk about the fact that the dough becomes the crust and once they decide what color the crust should be, they color the outside of the plate (the bumpy part) that color.  Then they add the sauce (red).  We use some glue before sprinkling on the cheese and any other toppings the kids want to add.

I found this cute activity from Family Fun Magazine.  There's a printable pizza and printable toppings.  Some of the toppings are real pizza toppings (e.g., bacon, pepperoni, olives) and some are silly (e.g., blocks, cards, pops).  I wanted to adapt this to be a sorting activity for my preschoolers so I created the "Yuck Plate."  I took a paper plate and drew a face on it...the kids LOVE this (not sure why!).  I place the items in a bag and the kids sort what can go on a pizza and what would be yucky/silly to put on a pizza.  I emphasize the "what can go on a pizza" part because the kids will ALL want to put mushrooms, olives onions, etc. on the Yuck Plate!


Lastly, I purchased this Melissa & Doug Make-a-Meal Sticker Pad at my school.  I thought it could be a fun addition to this theme.  The kids can follow directions to add toppings to the pizza or set up a plate.  You could also use these in a barrier game format!


I love using a pizza theme in my therapy sessions!  I have a few other pizza related books (look out for another in the near future) and they're so fun!  What are your favorite pizza-themed books and activities?


Thursday, June 27, 2013

App Review: Prepositions Journey

This year I have had a TON of kids who are working on prepositions.  Waaayy more than usual and I'm not sure why.  With that being the case, I wish this app had been released sooner!  


Prepositions Journey is the latest app by Virtual Speech Center.  This app was designed by a certified speech and language pathologist and targets comprehension and use of early/common prepositions in a fun, motivating way.

Getting Started:

From the menu screen, you can tap the "Info" button to review a description of Prepositions Journey.  From this tab you can also view more apps by Virtual Speech Center, follow them on Facebook and Twitter, and sign up to receive newsletters via email.


You can choose/adjust your settings by tapping "Settings."  Settings include:  Enable Audio, User Alternate Count, Automatic Paging, Random Paging, and Correct/Incorrect Sound.


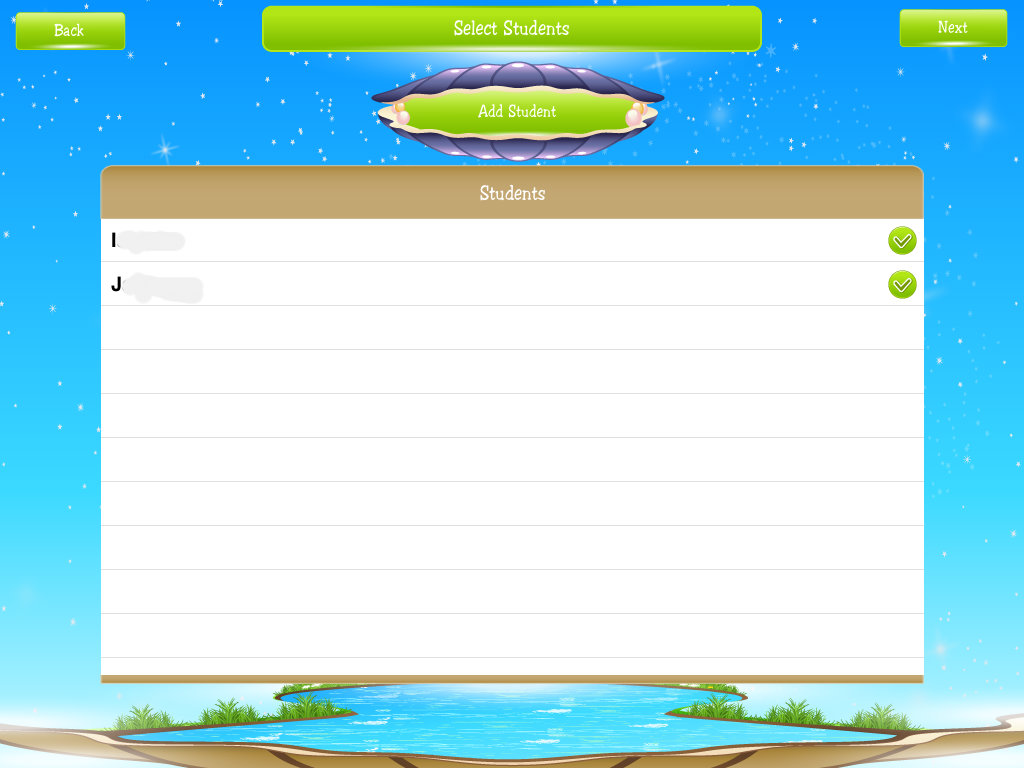
Once your settings are configured and you are ready to begin, tap the "Start" icon to add/select students.


For each student, you will select target(s).  The app will remember your selections the next time you play, but you can easily change them if you need to modify.  You can also select from three different settings/categories:  Lake Camping, Island, and City.


The prepositions targeted in this app (receptive and expressive) include:

  • Above
  • Behind
  • Below
  • Beside
  • Between
  • Far
  • In
  • In front
  • In the back
  • In the middle
  • Near
  • Next to
  • On
  • On the left
  • On the right
  • On the side
  • Out
  • Outside
  • Over
  • Under

Receptive:
You can choose any/all of the prepositions above to work on receptive understanding.  For receptive tasks, students will hear a description and have to touch the correct illustration.  Here are some sample of receptive targets:

"Show me the rabbit below the hammock."

Scene from "Lake Camping"
"Show me the fox above the umbrella."

Scene from "Island"


"Show me the squirrel between the stop signs."

Scene from "City"
*Receptive targets will automatically tally correct/incorrect responses!

*Notice the "Record" and "Play" buttons?  You can easily make receptive identification of prepositions an expressive activity as well by having students describe the correct and/or incorrect responses.  You can record the child's responses and play back to monitor for carryover of articulation/voice/fluency.

Expressive:
You can choose any/all of the prepositions listed above for practicing use of prepositions to describe location.  For expressive tasks, students are asked to describe the location of an animal.  Here are some examples of expressive targets:

"Where is the squirrel?"

Scene from "Lake Camping"

"Where is the rabbit?"

Scene from "City"
*The target preposition for the picture above was "In the middle."

"Where is the fox?"

Scene from "Island"

*With the expressive targets, you can also record and replay a student's responses.  This is great for allowing a child to compare their own use of prepositions and overall syntax with an adult model!

*During expressive tasks, the clinician will use the check and "x" buttons to mark responses as correct/incorrect.


Back on the Home Page, you will notice a "Reports" button.  When you click this, you will be able to view data from your sessions.  You can view data by activity or by date.


The app will generate a report that includes the date/time, the target, and a percentage.  You can print the report if you have AirPrint capabilities or email the report to yourself/parent for printing.


And there you have Prepositions Journey!  Here's what I think:

The Pros:
  • Prepositions are a huge area of focus for my population!  This app is a motivating way for students to learn these concepts.
  • The ability to target both receptive understanding and expressive use of prepositions in one app is fantastic!
  • Data collection and report generation are two must have features in any app geared for use in therapy sessions!
  • The graphics are adorable and the kids enjoy the settings and the animal characters.
  • You can record responses so that students can hear their responses.  This allows you to use the app for expanded purposes (e.g., articulation carryover, fluency practice, etc.).
Changes I would like to see in an update:
  • Some of the picture targets were a bit unclear to my students.  For example, when the squirrel was in the backpack, they weren't sure if she was actually in the backpack or standing on the backpack.
  • Many of VSC's apps have built in reinforcement and I was expecting Prepositions Journey to have it as well, but no such luck.  (For some of you this might be considered a "Pro," but my kids really work for the reinforcements!).

The bottom line:
Prepositions Journey is a great app for targeting prepositions in both receptive and expressive contexts.  The app is colorful and engaging to students, meaning increased motivation!  Because you can record student responses, you can use this app for a wide range of purposes, including carryover of articulation, fluency, and voice strategies.  Prepositions Journey is another winner for Virtual Speech Center!  Prepositions Journey sells for $9.99 in iTunes.

Do you work on prepositions a lot in your therapy sessions?  Do you find yourself working on receptive or expressive more frequently?


Disclaimer: Although I was provided with a copy of this app for the purpose of this review, the opinions expressed are mine alone.
Related Posts Plugin for WordPress, Blogger...