Showing posts with label receptive language. Show all posts

Wednesday, October 23, 2013

Product Review: Pirate Talk by Super Duper

Oh that red box! Who doesn't love coming home to find one of these at their door?


When the nice folks at Super Duper contacted me about reviewing one of their products, I was happy to do so!  First, I'd be foolish to say no to an awesome product from Super Duper (yes I knew it would be awesome before even opening the box!). Second, I love getting new materials for my kids.  Third, I know many of you look to bloggers like me to find how what we really think of products and apps!  Here's what was in the box:


The Details:

Pirate Talk: Receptive & Expressive Language Game.
Created by: Sarah Michaels and the Super Duper Staff.
Grade Level: K-5
Description (from Super Duper's website):  Your students are about to embark on a swashbuckling adventure as they sail the high seas with Pirate Talk, the receptive and expressive language skills game! As students respond to each prompt, they move from island to island on the colorful game board and collect gold coins. The prompts reinforce seven essential communication skills:  Sentence Repetition, Answering Questions, Following Directions, Categorizing, Inferencing, Describing, and Social Skills.
Includes:  Game Board, 150 Color-Coded Receptive and Expressive Language Cards(5 subject areas, 30 cards each), Instruction Sheet, 6 Pirate Player Pieces, 100 Gold Coins, and Electronic Spinner (1–3)


A Closer Look:

My son has learned that a box at the door equals something fun.  So when we came home, he begged me to open this one right away!  We opened the box, took out the game board, and checked out the other items:

Notice M's foot anxiously waiting to play!
I skimmed the directions because I prefer games that allow you to fly by the seat of your pants.  I believe that if the directions are too long and complicated, the kids won't want to play the game.  Am I right?  Anywhoo...you can see that the game comes with basic directions and game variations!  This is great for changing things up and using the same materials for multiple sessions, but in new and exciting ways!


After that, I organized the cards.  I think it's a personality requirement for SLPs to love organization and clearly Super Duper is a company of SLPs! The box has a tray that holds your cards and the cards come color coded and with dividers:


The cards have different scenes on the front.  The scenes depict scenarios from 5 different categories:  activities, community, home, school, and people.  Here's a sample card from the "activities" section:


Super Duper really does have great illustrations, don't they?  On the back of each card are the prompts for each target area: Sentence Repetition, Answering Questions, Following Directions, Categorizing, Inferencing, Describing, and Social Skills. I found that we could use the pictures as conversation starters as well.

Notice that some cards allow children to earn "bonus" coins!

Instead of dice, Pirate Talk comes with an electronic game spinner! How cool is this?!? I love that you only have the option of spinning a 1, 2, or 3 and I may just have to use this with other games as well!  The kids loved pushing a button instead of rolling a game die and NOTHING fell on the floor!! :)


What may just be the best part of this game is that it comes with 100 gold coins! I didn't count them, I'm going to take Super Duper's word for it!  Boys and girls were thrilled to play this game and to earn these shiny coins!


Trying it Out:

My son was in love with the game and didn't really want me to bring it to work.  Once he got over that, I brought it to school and tried it out with my kids.  I used it with kids in Preschool and in Second Grade.  We played the traditional version, nothing fancy.  The kids LOVED it! I loved that I could use it in a mixed group and target different objectives with the same cards!  I did find that with larger groups of kids, we weren't able to "finish" the game by returning our pirates back to their home bases, but none of the kids minded. They were happy to count their coins to find the winner.  If you're wondering, 2nd grade loved it as much as the preschoolers.


Bonus Activity:

My super-observant friend Stephanie was quick to make this observation...There are 100 gold coins. New information suggests aiming for 100 articulation trials/session.  See where I'm going with this?  You can use the coins for motivation in an Articulation Challenge!


I made a quick "bank" out of a butter tub, but how much fun would it be to use a treasure chest piggy bank!?!?


The Take-Away:

Pros:

  • As a receptive/expressive language game, Pirate Talk has it all.  You can look at a picture scene and ask each type of question, in addition to targeting inferencing and pragmatics.
  • Versatility!  The game cards themselves make Pirate Talk versatile, but the adaptability of the game goes beyond that. (See description below)
  • Fun! Who doesn't love a pirate theme?!?
  • The description on the box says that this game is for Grades K-5, but the box itself says that you can use it with Grades K and up or Ages 4-10.  

Cons:

  • I can't think of a single one!


The Bottom Line:
Pirate talk is a fun, engaging addition to your therapy supply closet.  According to the game's description, you can use it to target 7 areas of communication. However, I have found that you can use it for so much more than that!  The game board can be used for an open-ended activity, the spinner can be used to make your game boards (like those from TPT) more fun, and the gold coins can be used to get 100 trials during Articulation Burst therapy!

If you have Pirate Talk, what's your favorite game variation?  If not, what's your favorite product from Super Duper?


Tuesday, August 6, 2013

Letterboxing, Part 2 (Incorporating into Speech/Language Therapy)

Warning:  This post will make a lot more sense if you have already read my post Letterboxing, Part 1. :)

Yesterday I shared a little bit about Letterboxing with you.  As soon as I heard of this activity, I knew it could have amazing applications in speech and language therapy sessions.  However, most of us can't just take our kids on scavenger hunts all over town...I mean, that would likely take WAY more than the standard 30 minute speech session would allow!  So, how can you incorporate Letterboxing into your therapy sessions?  Easily!  Instead of having your students Find Letterboxes, have them Plant one!


Think about it...every Letterbox out there was put in its location by someone.  Each of the clues on the site were written by someone!  Why not you and your students?  Public schools are, by definition, on public property.  You could plant a Letterbox without even leaving school grounds!  Also, have you checked out some of the clues?  They range from really simple (Go to X location. Look for Y landmark. Find Letterbox) to complex.  Some include a history of the location, some are elaborate fictional stories about the location, and some take you to on (what feels like) an expedition!

Planting a Letterbox in Speech:

  • First of all, I recommend this activity for grades 3 and up.  However, once you have planted the letterbox, you can go "find it" with some of your younger groups.  
  • You may also wish to get permission from your principal. Once you get the OK...
  • Explain Letterboxing to your kids.  You could even stage a mock indoor letterbox for your students to find so they get the idea. 
  • Take your sessions outside and decide on a location.  You can even do this with multiple different groups and then have the students vote on their favorite location.
  • Create your box.  You can view the Letterboxing website for some information on planting clues. I recommend a box that you know will be air/water tight and putting the items in a Ziploc bag within the box.  
  • Decide how much information you want your students to include in the clues.  (This may vary between groups.)  Some ideas:  a brief history of the school, students's favorite things about the school, a short bio on the person for whom the school is named, etc.  Help the students research and start writing the information you decided to include, as well as the clues to get to the box location.
  • Do a walk-through of the clues with the students.  Follow the directions as literally as possible.  This will help the students see which directions may need to be clarified.
  • Once your clues are completed, plant the box and upload your information to the Letterboxing website.  You may want to check your box once in a while to see whether or not you've had visitors.
  • Use the clues with your other groups, especially those that are working on auditory comprehension and following directions!  


You can target so many goals by planting a Letterbox (expressive language, receptive language, giving directions, following directions, written language, carryover of any skill, etc., etc., etc.)!  Do you think you could plant a Letterbox with your students?

Tuesday, July 23, 2013

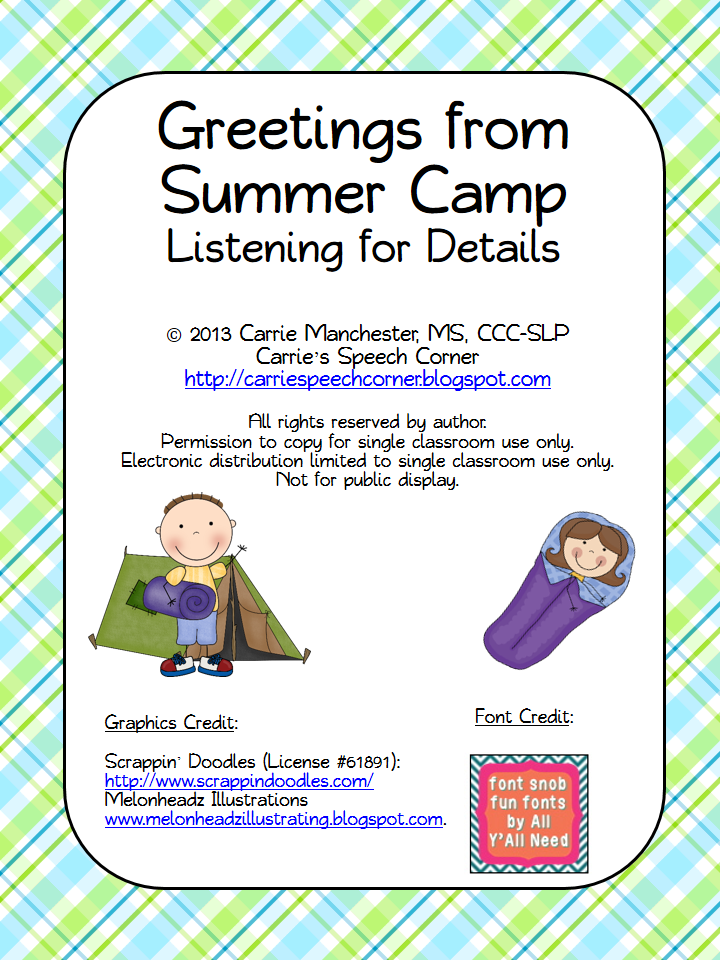
Greetings from Summer Camp

I've had so many high hopes for this summer, but have found myself in a motivational slump!  We've been spending lots of time in the yard and keeping busy with errands, seeing friends, etc.  However, I've NOT been very good about writing blog posts!  Case in point. I created about three new TPT products, but haven't blogged about them so you'd know they were there!  I'm going to share one of those with you today.


This item is called "Greetings from Summer Camp" and it focuses on listening for details.  In this packet, you get 12 "Letters from Summer Camp" (3 pages, 4 cards/page).  These are written by campers to their relatives and friends at home.  


For each Letter, there is a corresponding set of questions.  I arranged these pages so that you could print the questions on the back of the letters if you choose to do so.


I also included these cute Polaroid-style "Photos from Summer Camp."  These correspond with the letters as well and you can have students match the photos to the appropriate letters.  


I like to use real envelopes for students to match the letter/photo.


If you have students who are working on writing skills, I have also included a writing prompt.  The students are instructed to pretend they are at summer camp and to write a letter to someone describing their favorite things about camping.


You can find out more about this product in my TPT store.  It sells for $2.00.  Whenever I post a new product to TPT, I like to include a giveaway.  Three readers will win a copy of "Greetings from Summer Camp." You can enter using the Rafflecopter below!


Monday, July 22, 2013

App Review & Giveaway: Describe it to Me

I'm so excited to bring you some info on the latest app by Smarty Ears Apps - Describe It To Me.  This app, like all of those developed by Smarty Ears, was designed by a certified speech-language pathologist. The coolest thing about this app is that it uses a game show format to build receptive and expressive language skills.  The app description states that Describe it To Me is "designed to help clients build a deeper understanding of everyday items."  But you can do so much more with this app than that! (More on that later.)


Getting Started:
Before we start, I wanted to share a few features that are available from the home screen.  Support: This button allows you to watch a video tutorial on using the app, view a description of the app, backup/restore the app, and email Smarty Ears for support.  More Apps:  View more of the apps available from Smarty Ears.  Report Center:  This is where you can go to view the data from your Describe it to Me sessions.


When you're ready to begin, tap Play.  You will need to add a player to begin.  You can manually add a player or import players from Therapy Report Center. When you add a player, you can choose to import a photo (from the camera or photo roll) or use one of the many built-in avatars.  The screenshot below shows you an example of both an avatar and photo icon.


From this screen, you can also adjust the settings for the app.  You can choose what happens when the student is incorrect (buzz or remove the item), choose visual/auditory reinforcement, choose whether or not to display points, and choose whether or not to use a spinner.  From this screen, you can also customize the word list (below) by selecting/deselecting words (below). For example, if you are using with younger kids, you might want to keep the vocabulary more simple.


Using the App:
Once you have your players added/selected and your settings selected, you are ready to begin.  You can use this app with up to five players. The players will be displayed on the spinner.  The target word/object is displayed on the television screen and the question type is displayed above the screen.  You can change the target word by pressing the forward/reverse buttons on the side of the screen and switch from receptive/expressive targets by sliding the button to R/L.  Change students by tapping the avatar of the desired player.


Receptive:
In the receptive mode, the student is given questions about the object with four possible answers.  There are six questions for each item (located along the top of the TV screen).  These can be changed by sliding the indicator icon.  The questions are related to:

Category:


Function:


Parts:


Location:


Visuals:


Extra:


I used the same object for each question type so you could get an idea of the question asked.  The questions are generally the same for each object.


Expressive:
For the expressive component, the same six question types are present and the questions that are asked are the same as in the receptive component.  However, in expressive mode, the student must respond verbally.  You can score a student's responses by tapping Correct/Almost/Incorrect.


Reports:
When you're finished with your session, tap DONE.  As with most Smarty Ears apps, Describe it to Me has built in data collection and will generate reports based on your sessions.  You may view/email these reports, or export to Therapy Report Center.


Reinforcement:
Describe it to Me has a few different types of reinforcement.  First, do you remember the settings?  You could select Visual and/or Auditory Reinforcement.  The visual is shown below.  The auditory is a sound that occurs when the student gets the item correct.


In addition, Describe it to Me provides rewards whenever a child gets 10 correct answers in a row:


These rewards will be stored in the player profile of the app.


Homework:
Describe it to Me has built in homework sheets that you can email to a parent or email to yourself for printing.  We all know that carryover is essential and what better way to promote carryover than home practice!


Eliminate 1:


Circle 3:


And that's Describe it to Me!  Here's what I think:

The Pros:
  • I've often used a "Describing Hierarchy" in my therapy sessions that is somewhat similar to the question prompts in this app.  I've found using an approach like this to be helpful for students with word retrieval difficulties.
  • Receptive/Expressive components in the same app!  We all have mixed groups, right?  This app makes working with mixed groups easy!
  • The app description says that is was designed to be used to build a deeper understanding of everyday items.  It really can be used for so much more:  increasing vocabulary, answering wh- questions, use and comprehension of categories, use and comprehension of attributes, part/whole relationships, object functions, word retrieval, etc.
  • I don't have an EET, but have read up on it a bit.  This app looks like it focuses on similar concepts and can be used in conjunction with EET.
  • I love the built-in home practice sheets! They can easily be shared with teachers or parents for printing.
  • Built in reinforcement and data collection are always big pluses in my book.  Because of the reinforcement and fun game show format, kids may be more motivated to practice skills using the app than without it.

The Cons:
  • I've turned the spinner on.  I've turned the spinner off.  I cannot notice a difference either way.  
  • I would love to be able to record expressive responses.  With that said, I know that adding a recording feature would likely increase both the price and storage space of the app, so I can live without that feature.

The Bottom Line:
Describe it to Me is a great app that can be used to address so many language targets.  This app is fun and motivating for students, not to mention affordable.  Describe it to Me features similar concepts as the EET and is a great addition/companion to the EET.  I cannot wait to try this app with some of my students with word retrieval difficulties because I know it will make a difference!  As of this posting, Describe it to Me is on sale for $4.99 in the App Store.  The regular price of this app is $9.99.  Smarty Ears was kind enough to provide a copy for me to give away today.  To enter, use the Rafflecopter below.


Monday, July 15, 2013

App Review: Comprehension Aphasia

I had the pleasure of trying out Comprehension Aphasia by the Virtual Speech Center.  Despite its name, this app is not just for adults, but can be used with children who have comprehension issues as well!


You can see the home screen of Comprehension Aphasia above. If you tap the info button, you will see a description of the app as well as how it is used:


According to the description, Comprehension Aphasia "focuses on auditory comprehension of increasingly longer and complex yes-no questions and directions with the ability to turn on background noise."  The app can be used with clients who exhibit aphasia, cognitive deficits, decreased attention, Central Auditory Processing Disorder (CAPD), receptive language impairments, and autism.  In my opinion, this app can be used with any client who needs to strengthen their ability to listen to and comprehend spoken language (specifically questions and directions).

You can tap More Apps to see a list of apps by Virtual Speech Center, along with a description of each app.  You can also modify the Settings for the app from the home screen:


Settings include:  Turning on/off audio, automatically moving to the next item when a response is given, randomization of items, turning on/off background noise (and adjusting both the type of noise and the volume), and modifying the sounds heard for correct and incorrect responses.

Using the App:

When you tap Start from the home screen, you will be prompted to add/select students.  You can use this app with individual clients or in groups.


Once you have your student(s) selected, you will be prompted to select activities.  You may select multiple activities for each student playing, then tap Next to begin.


 The activities in this app include:

1.  Yes/No Questions:

  • Yes-No Questions with pictures (Nouns, Function of Objects, Verbs, or Adjectives)
  • Concrete Yes-No Questions without pictures
  • Abstract Yes-No Questions without pictures

While targeting yes/no questions with pictures, the client is given a verbal question (written cues for stimulus items are not utilized in this app) and shown an image.  A question is posed regarding the image.  Examples include:  "Is this an apple?" (Nouns), "Do we use a garden hose to water?" (Function of Objects), "Is she reading a book?" (Verbs), and "Is this rose long?" (Adjectives).

"Is this an apple?"

Examples of Concrete yes/no questions without pictures include, "Do we wear sunglasses on our feet?" and "Do people sleep at night?"  Examples of abstract yes/no questions include "Do we wash our hair after we go to bed?" and "Is a dime more than a quarter?"  For these items, the client will be shown only the words "Yes" and "No" and will select their response by tapping the appropriate word.

"Do people sleep at night?"


2.  Basic Directions with 1 Element:

  • Follow 1-step Directions with 1 Item - Nouns (field of 3, 4, or 6 pictures)
  • Follow 1-step Directions with 1 Item - Verbs (field of 3, 4, or 6 pictures)
  • Follow 1-step Directions with 1 Item - Adjectives (field of 3, 4, or 6 pictures)
  • Follow 1-step Directions with 1 Item - Function of Objects (field of 3, 4, or 6 pictures)

For these activities, clients will be prompted to touch one picture from a field that best fits the description. Examples include:  "Show me the trumpet" (Nouns), "Show me the girl blowing bubbles" (Verbs), "Show me the angry man" (Adjectives), and "Show me the object used to mix" (Function of Objects).

"Show me the stapler"

"Show me the man shaving"


3.  Basic Directions with 2 Elements:

  • Follow 1-step Directions with 2 Items - Nouns (field of 3, 4, or 6 pictures)
  • Follow 1-step Directions with 2 Items - Verbs (field of 3, 4, or 6 pictures)
  • Follow 1-step Directions with 2 Items - Adjectives (field of 3, 4, or 6 pictures)
  • Follow 1-step Directions with 2 Items - Function of Objects (field of 3, 4, or 6 pictures)
For these activities, the client is asked to point to two objects instead of one (as above).  Because you are selecting more than one object, you must press "Go" when you are finished.  Examples include, "Show me the cap and the chair" (Nouns), "Show me the  girl sleeping and the child taking a bath" (Verbs), "Show me the empty basket and the full basket (Adjectives), and "Show me the animal that lives in the jungle and the object used for blending" (Function of Objects).


"Show me the broccoli and the bicycle."

"Show me the sweet food and the pink food."


4.  Temporal Directions:

  • Follow 1-step Directions with Concept "Before" - Nouns (field of 3, 4, or 6 pictures)
  • Follow 1-step Directions with Concept "Before" - Verbs (field of 3, 4, or 6 pictures)
  • Follow 1-step Directions with Concept "Before" - Adjectives (field of 3, 4, or 6 pictures)
  • Follow 1-step Directions with Concept "After" - Nouns (field of 3, 4, or 6 pictures)
  • Follow 1-step Directions with Concept "After" - Verbs (field of 3, 4, or 6 pictures)
  • Follow 1-step Directions with Concept "After" - Adjectives (field of 3, 4, or 6 pictures)


The directions in this set are increased in complexity.  Again, you must select two pictures and press "Go" when finished.  Examples of "Before" items include:  "Show me the office before you show me the fox" (Before - Nouns), "Before you show me the man pouring water, show me the boy eating" (Before - Verbs), "Show me the open can before you show me the open mailbox" (Before - Adjectives).  Examples of "After" items include:  "Show me the hand after you show me the chicken" (After - Nouns), "After you show me the child crawling, show me the child taking a bath" (After - Verbs), "Show me the long hair after you show me the short measuring tape" (After - Adjectives).

"Show me the child drawing, before you show me the child crying."

"After you show me the belt, show me the eggs."


5.  Conditional Directions:

  • Follow Conditional Directions - Nouns (field of 3, 4, or 6 pictures)
  • Follow Conditional Directions - Verbs (field of 3, 4, or 6 pictures)
  • Follow Conditional Directions - Adjectives (field of 3, 4, or 6 pictures)

These activities are the most complex and include the most linguistically complex directions.  Examples of conditional directions include:  "If kangaroos live in Australia, tap the chicken.  If not, tap the 'Go' button" (Nouns), "If raisins are made from grapes, tap the woman watering.  If not, tap the 'Go' button" (Verbs), "If not, tap the 'Go' button" (Adjectives).

"If we pay full price with a coupon, tap the man yawning.  If not, tap the 'Go' button."


What I like about this app:
  • The variety within the levels.  This app really does allow you to challenge clients/students by increasing complexity.  You can target yes/no questions with and without visual cues in addition to following basic directions and complex directions. 
  • The ability to add background noise makes each level more challenging.  An adult with aphasia may have difficulty distinguishing figure/ground and, with this app, you can target that skill easily.  
  • The ability to target vocabulary and concepts using real life photographs. 
  • If a client/student is working on repeating directions, you can record them as they are repeating in addition to replaying the original direction.  Using these features, a client can compare what they heard/perceived vs. what was initially said.
Changes I would like to see in an update:
  • I've been trying to think of something I would like to see changed and I really couldn't come up with much.  My first thought was to add an option to have written cues for directions, but that would undermine the focus of auditory comprehension.  So, I guess there isn't anything I would change about this app!
The Bottom Line:
Comprehension Aphasia is a great app for anyone working on improving their auditory processing/receptive language abilities.  It's a comprehensive app that allows you to work on so much, while increasing cognitive and linguistic complexity.  I have to admit, I wasn't sure about this app upon hearing the name of it as I typically work with younger children.  However, I was VERY pleased with the app and I think I will be able to use it with some of my younger students as well!  I think "Comprehension Aphasia" may be a bit of a misnomer for this app because it really can be used for so much more than just aphasia!  If you do have students on your caseload with auditory processing/listening comprehension difficulties, you will not be disappointed with this app!  Comprehension Aphasia sells for $19.99 in the App Store.

Have you tried this app?  If so, what do you think of it?


Disclaimer:  Virtual Speech Center provided a copy of Comprehension Aphasia for the purpose of this review, but the opinions expressed (as always) are mine alone.
Related Posts Plugin for WordPress, Blogger...