Hi Everyone!
My buddy Shannon over at Speechy Musings is hosting a "Speech Room Staples" linky party! One of my goals for this school year is to get back to blogging and I figured this is the perfect opportunity for me to start up again. Check out her original post and some other link-ups HERE.
Here are a few of my go-to favorite TPT purchases:
1. Language Progress Monitoring Tool - Lower Level by Natalie Snyders
I really can't say enough about this. I've been using the overall screening portion included to gather baseline data on my language students. I love that it includes pretty much all of my most common IEP objectives as well...perfect for gathering information at progress report time!
2. Itty-Bitty Books for Articulation by Schoolhouse Talk
These are just great for a quick therapy activity when introducing a new sound or reviewing a mastered sound. If you're working in a group, you can focus on drill with one student at a time while the rest are coloring their pictures. They are perfect for home practice as well!
3. Language Dice by The Buckeye Speech Path
If you haven't noticed my theme here, most of my go-to activities are black and white. I'm splitting my time between two schools this year and I need to be highly portable! I love this language dice game for a few reasons, most notably that there are a ton of different targets. Also, I can snap a picture of a page using my iPad (or screenshot from DropBox) and open in the Doodle Buddy app. The students can mark off their items right on the iPad and I never needed to make a trip to the copy machine!
4. No Print Bundle Pack by Nicole Allison
No-print/No-prep activities are a must for traveling therapists! I love the variety of activities in this bundle and the kids love that they can "play" on the iPad!
I have a few go-to favorites from my own store as well. Here they are:
1. Seasonal & Thematic Dot Reinforcers
I like these because I have two options...I can grab dot markers or stickers and use the black and white version. Or I can print/laminate the full color sheets and use my bingo chips and magnetic wand. The kids love these activities and I can use them with any target!
2. Feed the Penguin Activities:
I know this probably looks more seasonal than most of the others and you might be thinking, "How can a seasonal item be a speech room staple?" Well, kids just love to feed things! You can print different animals for the kids to feed (like the shark I printed to go with a fish/shark book):
I actually have three different Feed the Penguin Activities in my TPT store. Here are the links:
1. Feed the Penguin: Bilabial CV, CVC, CVCV words (FREEBIE)
2. Feed the Penguin: Articulation Pack
3. Feed the Penguin: Language Pack (I also have a money saving bundle of the language and articulation packs, which can be found HERE).
I hope you find this post helpful! What are your speech room staples? I'd love to hear from you!
Showing posts with label language. Show all posts
Monday, September 22, 2014
Monday, February 3, 2014
Book of the Week: Sneezy the Snowman
Disclaimer: This post contains affiliate links to Amazon.com for your convenience.
It feels like FOREVER since I've actually had the chance to sit down and share with you what I've been doing in my speech room! Before Christmas, my son came home telling me about a book that his preschool teacher read to him. It sounded fun! The next week, a co-worker had it out in her pile of snow themed books and I had to check it out. Sneezy the Snowman is now one of my all-time favorite snowman books!
I encourage you to head over to Amazon and use the "look inside" feature. You won't be disappointed! In the story, Sneezy keeps looking for things to make him less cold. The first thing he does is drink hot cocoa. Many of my students can relate this...it is a fairly common activity post-snow play! If you follow me on Instagram, you may have noticed that we used Hot Cocoa Speech (a very fun freebie) by Lauren over at Busy Bee Speech:
I used cotton balls because we're not supposed to give food to students...well, technically there is a loophole. A permission slip must be signed by the parent of EVERY student in the group. It just so happens that one of the teachers with whom I work had already sent home a permission slip for marshmallows! So, after reading the story to that class, we discussed ways to warm up and what we like to eat with our hot cocoa. The kids made this craft (the pattern is from Mailbox Magazine) to bring home:
Every January, I target /s/ blends with my articulation students. Why January? Well, it's the perfect opportunity to target the sound in a naturalistic way! There are just about 100 ready-to-go target words! Here are just a few: snow, snowman, snowball, skate, scarf, sled, slide, slip, slippery, skid...You get the idea! So, with my articulation groups, we made this snowman craftivity:
For the snowman, I used a printable page from Tales of a First Grade Teacher. I got the photos from Phonology Roundup by Super Duper (I got the book that comes with a CD ROM). I printed 2 pages per sheet of paper so the pictures would be smaller. We glued the target words on and, in some cases, added some bonus words (sticks, snowflakes, scarf)!
And that pretty much sums up my week last week! I'd love to hear from you. Have you read "Sneezy the Snowman"? If so, what do you think of it?
It feels like FOREVER since I've actually had the chance to sit down and share with you what I've been doing in my speech room! Before Christmas, my son came home telling me about a book that his preschool teacher read to him. It sounded fun! The next week, a co-worker had it out in her pile of snow themed books and I had to check it out. Sneezy the Snowman is now one of my all-time favorite snowman books!
I encourage you to head over to Amazon and use the "look inside" feature. You won't be disappointed! In the story, Sneezy keeps looking for things to make him less cold. The first thing he does is drink hot cocoa. Many of my students can relate this...it is a fairly common activity post-snow play! If you follow me on Instagram, you may have noticed that we used Hot Cocoa Speech (a very fun freebie) by Lauren over at Busy Bee Speech:
I used cotton balls because we're not supposed to give food to students...well, technically there is a loophole. A permission slip must be signed by the parent of EVERY student in the group. It just so happens that one of the teachers with whom I work had already sent home a permission slip for marshmallows! So, after reading the story to that class, we discussed ways to warm up and what we like to eat with our hot cocoa. The kids made this craft (the pattern is from Mailbox Magazine) to bring home:
Every January, I target /s/ blends with my articulation students. Why January? Well, it's the perfect opportunity to target the sound in a naturalistic way! There are just about 100 ready-to-go target words! Here are just a few: snow, snowman, snowball, skate, scarf, sled, slide, slip, slippery, skid...You get the idea! So, with my articulation groups, we made this snowman craftivity:
For the snowman, I used a printable page from Tales of a First Grade Teacher. I got the photos from Phonology Roundup by Super Duper (I got the book that comes with a CD ROM). I printed 2 pages per sheet of paper so the pictures would be smaller. We glued the target words on and, in some cases, added some bonus words (sticks, snowflakes, scarf)!
And that pretty much sums up my week last week! I'd love to hear from you. Have you read "Sneezy the Snowman"? If so, what do you think of it?
Labels:
articulation
,
Book of the Week
,
books
,
crafts
,
language
,
winter activities
Thursday, July 11, 2013
Book of the Week: Curious George and the Pizza
Disclaimer: This post contains affiliate links to Amazon.com for your convenience.
I really love being on summer vacation! I'm sure I'm not the only one, right? I've been busy relaxing and having fun with my son, so I've been slacking at writing blog posts. Sorry about that! I'm back today with a Book of the Week with one of my favorite books - Curious George and the Pizza!
I stopped by a local pizza place and asked for an empty pizza box:
Before I read the story, I show the kids the box and ask them what they think my story is going to be about. I get that this should be really, really easy, but some of my preschoolers don't guess correctly (!). Once I get a few guesses, I reveal what's inside the box:
I ask the kids to tell me what's on the pizza and I ask each one what they like on their pizza. Then I read the story. A quick summary - George and his friend head out to the pizza restaurant and George gets into a bit of a mess (literally). One of my favorite things about this book is that it gives a sequence for making a pizza. George also ends up stuck in the back of the pizza truck while the pizza chef is trying to deliver a pizza to a building behind a locked gate. How is he going to deliver the pizza? There are a few places in this book where you can stop and work on predicting/inferences and this is one of them!
After reading the story, I ask my wh- questions and we sequence the steps of making a pizza. We act out the steps during and after the story:
Using the actions paired with the steps makes this activity perfect for preschool and kindergarten. If they forget the words, cueing with the action generally makes them remember!
Extending the story:
I found this fun game at a local odd-lot type of store. It is now marketed under a different name - Poppa's Pizza Pile-Up. It's one of those games where you add something to the top and hope nothing falls down! I use this game as a basic reinforcement game for my groups.
With some of my groups, we do this pizza craft:
I give each child a paper plate and ask them to remember the steps of making a pizza. We talk about the fact that the dough becomes the crust and once they decide what color the crust should be, they color the outside of the plate (the bumpy part) that color. Then they add the sauce (red). We use some glue before sprinkling on the cheese and any other toppings the kids want to add.
I found this cute activity from Family Fun Magazine. There's a printable pizza and printable toppings. Some of the toppings are real pizza toppings (e.g., bacon, pepperoni, olives) and some are silly (e.g., blocks, cards, pops). I wanted to adapt this to be a sorting activity for my preschoolers so I created the "Yuck Plate." I took a paper plate and drew a face on it...the kids LOVE this (not sure why!). I place the items in a bag and the kids sort what can go on a pizza and what would be yucky/silly to put on a pizza. I emphasize the "what can go on a pizza" part because the kids will ALL want to put mushrooms, olives onions, etc. on the Yuck Plate!
Lastly, I purchased this Melissa & Doug Make-a-Meal Sticker Pad at my school. I thought it could be a fun addition to this theme. The kids can follow directions to add toppings to the pizza or set up a plate. You could also use these in a barrier game format!
I love using a pizza theme in my therapy sessions! I have a few other pizza related books (look out for another in the near future) and they're so fun! What are your favorite pizza-themed books and activities?
I really love being on summer vacation! I'm sure I'm not the only one, right? I've been busy relaxing and having fun with my son, so I've been slacking at writing blog posts. Sorry about that! I'm back today with a Book of the Week with one of my favorite books - Curious George and the Pizza!
I stopped by a local pizza place and asked for an empty pizza box:
Before I read the story, I show the kids the box and ask them what they think my story is going to be about. I get that this should be really, really easy, but some of my preschoolers don't guess correctly (!). Once I get a few guesses, I reveal what's inside the box:
I ask the kids to tell me what's on the pizza and I ask each one what they like on their pizza. Then I read the story. A quick summary - George and his friend head out to the pizza restaurant and George gets into a bit of a mess (literally). One of my favorite things about this book is that it gives a sequence for making a pizza. George also ends up stuck in the back of the pizza truck while the pizza chef is trying to deliver a pizza to a building behind a locked gate. How is he going to deliver the pizza? There are a few places in this book where you can stop and work on predicting/inferences and this is one of them!
After reading the story, I ask my wh- questions and we sequence the steps of making a pizza. We act out the steps during and after the story:
- grab some dough
- roll it into a ball
- flatten it like a pancake
- toss it in the air (catch it!)
- spread the sauce
- sprinkle the cheese
- put it in the oven (and wait!)
Using the actions paired with the steps makes this activity perfect for preschool and kindergarten. If they forget the words, cueing with the action generally makes them remember!
Extending the story:
I found this fun game at a local odd-lot type of store. It is now marketed under a different name - Poppa's Pizza Pile-Up. It's one of those games where you add something to the top and hope nothing falls down! I use this game as a basic reinforcement game for my groups.
With some of my groups, we do this pizza craft:
I give each child a paper plate and ask them to remember the steps of making a pizza. We talk about the fact that the dough becomes the crust and once they decide what color the crust should be, they color the outside of the plate (the bumpy part) that color. Then they add the sauce (red). We use some glue before sprinkling on the cheese and any other toppings the kids want to add.
I found this cute activity from Family Fun Magazine. There's a printable pizza and printable toppings. Some of the toppings are real pizza toppings (e.g., bacon, pepperoni, olives) and some are silly (e.g., blocks, cards, pops). I wanted to adapt this to be a sorting activity for my preschoolers so I created the "Yuck Plate." I took a paper plate and drew a face on it...the kids LOVE this (not sure why!). I place the items in a bag and the kids sort what can go on a pizza and what would be yucky/silly to put on a pizza. I emphasize the "what can go on a pizza" part because the kids will ALL want to put mushrooms, olives onions, etc. on the Yuck Plate!
Lastly, I purchased this Melissa & Doug Make-a-Meal Sticker Pad at my school. I thought it could be a fun addition to this theme. The kids can follow directions to add toppings to the pizza or set up a plate. You could also use these in a barrier game format!
I love using a pizza theme in my therapy sessions! I have a few other pizza related books (look out for another in the near future) and they're so fun! What are your favorite pizza-themed books and activities?
Labels:
Book of the Week
,
books
,
expressive language
,
language
,
receptive language
,
vocabulary
Thursday, May 30, 2013
Product Review: Tell Tales Fairy Tales by Blue Orange Games
Back to that box from the other day...
The other day, I posted a review of Spot It Jr! Animals by Blue Orange Games (see my review HERE). Today I'm going to share my experiences with Tell Tale Fairy Tales. This game is a variation of the original game - Tell Tale.
By the way, Tell Tale Fairy Tales has won the following awards:
- Dr. Toy 10 Best Creative Products
- Play Advances Language Award
- The National Parenting Center
Like the games in the Spot It! family, this game comes in a convenient tin for storage. And again, I wanted to include this part of the box in the picture so that you can see that this game is recommended for ages 5 and up, can be played with 1 to 8 players, and takes approximately 20 minutes to play.
This game contains 60 double sided cards with 120 total illustrations. The game instructions include four different ways to play:
- Storyboard: Everyone takes 6 cards and places them in the order they would like to tell their own story. Players take turns improvising a story based on the 6 images on their cards. ALTERNATE: Play in teams of 2. Make up the storyboard together and then tell the story taking turns. When the first team is finished, the next team tells their story.
- Round 'N Round: Everyone takes 4 cards and looks at their images. The first player chooses one card and places it on the table. Using this card as a starting point, s/he begins a story. The next player chooses one of his/her cards, places it next to the first card and adds to the group story. The game continues until the last card is used. ALTERNATE: Play in teams of two. Each team takes 6 cards. Teams take turns telling their communal stories. Storytellers within each team alternate as they add on to the story.
- Showtime: Everyone takes 6 cards. Without peeking, players place the cards face-down in a pile in front of them. One player begins a story by flipping over the first card. They continue flipping over all cards to add to the story until all cards have been used. The next player begins a new story, and so on. ALTERNATE: Play in teams of two. One team weaves the story together, alternating between team members (one team member starts with the first card, the other adds on to the story with the second card). Then it's the next team's turn.
- The Stack: Shuffle the cards and place 24 of them in a pile in the center of the table. The first player takes one card and begins a story. Players take turns picking one card from the stack and adding on to the story until no cards remain in the central pile.
- Narrative development: You can teach story grammar elements (characters, setting, problem, solution) and have students make sure to include these elements in their stories.
- Sequencing: This game is great for sequencing story events and for teaching words like "First," "Next," "Then," and "Finally."
- Sentence formulation/MLU: You can't tell a story without using full and complete sentences. This game provides a motivating, naturalistic way to target sentence formulation.
- Grammar/Syntax: This goes hand in hand with sentence formulation!
- Descriptive language/Colorful sentences/Vocabulary: Fairy tales are a great way to add "color" or description to otherwise simple (aka boring) sentences.
- Written language: Students can write out their stories using introduction, story, conclusion.
- Topic Maintenance and Perspective Taking: Students creating a story need to stay on topic and to make sure their listeners have sufficient background information to follow the story.
- Carryover activities for articulation and practicing voice and fluency strategies.
- Pragmatic language/Social skills: Form many of the variations, students need to work together to create a story.
I first used this game with a group of preschoolers (all of whom are five years old and going to kindergarten in the fall). I placed a bunch of the cards in the center of the table and told the students that we would be using the cards to write our own story. I gave them a few minutes to look at the cards and told them that they should remember to (1) keep the characters consistent throughout the story - you can add new ones, but don't let the others disappear; (2) add to the story without changing the setting; (3) link to the parts of the story that have already been told.
This is the story they came up with:
Once upon a time, there was a queen in a castle. A ghost was in the castle. She was afraid. The cat came and fight the ghost. The cat went back to the forest. He went into the cave. There was a dragon in the cave. The dragon had a princess tied up. The king asked the cat to save her. The cat used a sword to fight the dragon. The cat needed help from the knight. The knight called a genie. The genie came on his magic carpet. He had a map. The map showed a pirate ship. Then the sun came out and there was a rainbow. The cat and genie got the dragon and played a song. The cat gave flowers to the princess. She used the key to start the car. The End.
Once upon a time, there was a queen in a castle. A ghost haunted the castle. The queen was very afraid. The brave cat came and fought the ghost. Then the cat went back to the forest and into a cave. There was a fire-breathing dragon in the cave. The dragon he had captured a princess and tied her up. The king asked the cat to save the princess. The cat tried to use his sword to fight the dragon, but he needed help from the knight. The knight called a genie for help. The genie came to the rescue on his magic carpet. He had a map that showed a pirate ship. The cat and genie defeated the dragon and the cat played a song on a harp. The cat picked some beautiful flowers for the princess. She used her key to start the car and drive everyone back to the castle. Finally, the sun came out and a rainbow appeared in the sky. The End.
I asked him to think about the order that he wanted to use, think about the characters, the setting, the problem, and the solution. For him, we used the app Scribble Press ($3.99 in iTunes) to illustrate his story. With Scribble Press, you can use your iPad's camera function to add pictures to book pages. We took pictures of the individual cards and groups of cards. Here are some sample pages:
In the screenshot above, you can see that we have already added the pictures and words. You can also use markers and stickers to add to the pages. Once you have finished your book, you can "publish" to iBooks and also email to parents. With this student, I emailed the story to his mother so that the student could tell the story to his family members as practice.
![]() |
| *We fixed my typo before emailing to his mom! |
If you're curious, here's his story:
The Queen and the Knight
Once upon a time, there was a nice queen who lived in a castle. Then a dragon came and took the queen to a magic forest. In the forest, the queen saw a magic wand, a red potion, a green potion, and a blue potion. Then a knight came and fought the dragon. The magic wand touched the knight and turned him into a baby. The queen escaped the dragon and fed the baby the red potion and he turned back into a knight. Then the queen and the knight had a wedding and got married. And they lived happily ever after! The end.We didn't have time in our session to edit or add to his story, but we might just do that during our next session!
One more variation I used...I had a group of 4 reluctant speakers. After giving them the run-down, I gave them each three cards. Each child was told that they needed to use their cards (one at a time) to add to the story. Then I gave incentives to the kids who got rid of their cards first! This particular group always fights over who gets to be the line-leader, so the first student to get rid of all their cards was the line-leader back to class. The second got to turn off the light when we left the room (these don't sound like major incentives, but for these kiddos, they are!), and each student got a sticker when they turned in their last card! It worked like a charm! They all participated and only rarely tried to give me a totally off-topic story addition! I didn't get a chance to write down their story to share with you, but it was a thrilling tale of pirates, treasure, and a genie in a golden lamp!
I love this game for developing not only language skills, but also imagination! I do not have the original Tell Tale game, but if I did, I would bet that you could combine cards from both games to create even more stories! My only "problem" with this game is that the game cards are double sided. There were times that we were searching for an image ("I know I saw it somewhere!"), only to find it on the back of another card we were using. Also, the directions for some of the game variations call for you to place cards "face-down." Since both sides have illustrations, there really isn't a "face-down." For my kids, I would prefer one sided cards with the logo on the other side.
Well, there you have Tell Tales Fairy Tales! I hope you enjoyed the stories that were created using this game...we sure had fun writing them! If you are interested in purchasing this game, you can do so through the Blue Orange website. In addition, I was able to find both of the Tell Tale of the games on Amazon.com (affiliate links are below).
What do you think of this game? What would you use it to target?
Tell Tale and Tell Tale Fairy Tales (plus some other popular games from Blue Orange):
Disclaimer: Blue Orange provided Tell Tale Fairy Tales for the purposes of this review. However, the opinions expressed are mine alone.
Labels:
games
,
grammar
,
language
,
narrative development
,
sentence formulation
Friday, May 24, 2013
Sometimes plans get thrown out the window...
The second grade students in my school have been learning about dinosaurs. They completed 3-D projects about the different types of dinosaurs that they studied. I have to say that they came out GREAT! They are on display for the school to see - and they just happen to be located right outside of my door. Needless to say, they are quite the conversation starter on the way to therapy! Many of my students love dinosaurs and have had a hard time transitioning from talking about the projects to working on my planned therapy activities. Now what?
Well, I just threw my plans right out the window (figuratively speaking of course - I don't actually have a window!).
I grabbed my little dinosaur figures and some play dough and we made fossils.
I used my articulation cards and we did a couple of different things...
We added dinosaurs to the top of the cards as the words were said a specified number of times.
We added playdough and dinosaurs and had to excavate to find our words.
With some groups, we used the Buildo History app (this app is similar to Clicky Sticky) to create and discuss scenes, to follow directions, to give directions, etc.
And, finally, we used the Dinosaur Preschool Pack posted by Brea at Let's Talk Speech-Language Pathology. This packet is AWESOME (and free)! We used Yes/No and What questions, along with the game board.
And that's how I ended up with "Dinosaur Week"! How often do you end up scrapping your plans for the day/week?
Well, I just threw my plans right out the window (figuratively speaking of course - I don't actually have a window!).
I grabbed my little dinosaur figures and some play dough and we made fossils.
I used my articulation cards and we did a couple of different things...
We added dinosaurs to the top of the cards as the words were said a specified number of times.
We added playdough and dinosaurs and had to excavate to find our words.
With some groups, we used the Buildo History app (this app is similar to Clicky Sticky) to create and discuss scenes, to follow directions, to give directions, etc.
And, finally, we used the Dinosaur Preschool Pack posted by Brea at Let's Talk Speech-Language Pathology. This packet is AWESOME (and free)! We used Yes/No and What questions, along with the game board.
![]() |
| Images used with permission from Let's Talk Speech-Language Pathology. |
And that's how I ended up with "Dinosaur Week"! How often do you end up scrapping your plans for the day/week?
Labels:
articulation
,
language
,
therapy
,
therapy ideas
Monday, May 20, 2013
Summer Themed Preschool Language Pack
I've been seeing lots of SLPs across the country posting their countdowns on Facebook. "___ days left of school!" My district starts AFTER Labor Day and, instead of one week off in March, we get two weeks off (one in February, one in April). Add to that the number of days we've had to take (Hurricane Sandy, the Blizzard, etc.) and I will literally be in school until the end of June. But, like the rest of you, I'm counting down the days until my summer vacation. So, I was very inspired by some clip art I got from Scrappin' Doodles to create a new packet!
This packet targets the most common speech and language objectives I work on with my preschool-aged students. Here's what you get:
Subjective Pronouns (6 pages). Students will describe pictures using the words “he,” “she,” and “they.”
Yes/No Questions (4 pages). Students will answer yes/no questions about the pictures.
Possessive Pronouns & Is/Are Verbs (2 pages). Students take turns giving small tiles (20 total) to the boy and girl and completing the sentences (e.g., “The dog is his” or “The glasses are hers.”)
WHO Questions (3 pages). Students will answer the questions about the children in the pictures.
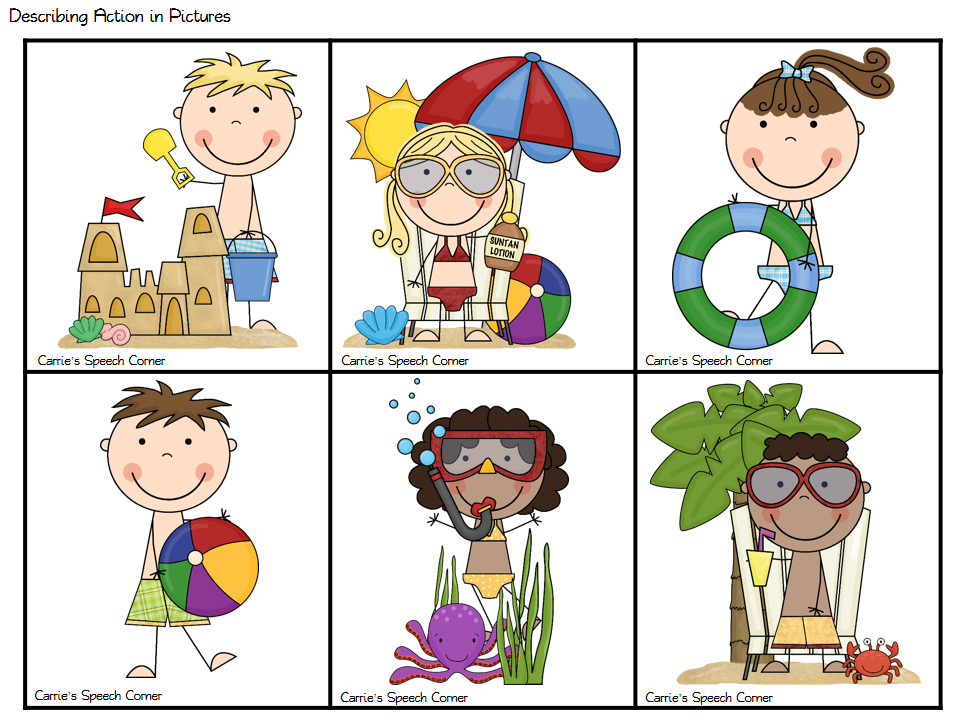
Describing Action in Pictures (2 pages). Students will describe the pictures using verb +ing and S-V-O formats.
Plurals (2 pages). Students will use the correct plural form to describe the pictures.
WHERE Questions / Prepositions (4 pages). Students will use prepositions to answer WHERE questions.
Game Board (1 page). You can use the game board on its own or in conjunction with the activities in this packet.
And there you have my "Summer Themed Preschool Language Pack!" You can access this product in my TPT store HERE. I'm giving away 3 copies! You can enter to win using the rafflecopter below!
Labels:
giveaways
,
language
,
prepositions
,
printables
,
pronouns
,
questions
,
summer activities
,
TPT
,
Yes/No Questions
Thursday, April 18, 2013
App Review: Describe With Art
Last week, I used two new apps by Virtual Speech Center in some of my therapy sessions: Syntax Workout (see my review of that app HERE) and Describe With Art. According to the Virtual Speech Center's website, Describe with Art was created by a certified speech and language pathologist. It's designed to be used with preschool and elementary school-age children who struggle with verbally describing or following directions containing descriptive vocabulary. Describe With Art was created to teach children how to describe things surrounding them and help them follow directions with descriptors in a fun and motivating way.
Using the App:
When you open the app, you see the screen above. From hear, you can go straight to the reinforcement (Paint) activity, view your reports from previous sessions, see information regarding the app and Virtual Speech Center, modify your settings, and start to play.
The settings you can modify for this app are:
Once you hit "Start," you will be prompted to add/select students. You are able to add multiple students and track their data. After selecting your students, you will then select the activity/activities you wish to use for each selected student:
In the "Describe It" activity, students are shown a picture and asked to describe the picture. In the example picture below, the prompt given is "Describe this person." You can tap the record button and record the student's response. If a student has difficulty generating a response independently, there are question prompts that can be accessed by tapping the numbers below the picture.
The question prompts for describing people are:
Follow Directions (Receptive Activity): For this activity, you can choose from five sets of questions. The student is shown 4 images and asked to select one based on descriptors. Here are some examples (one from each set:
Set 1: "Show me the tall farm animal that has white and black spots and gives us milk."
Set 2: "Show me the garden tool that is sharp and used for trimming."
Set 3: "Show me the elegant piece of clothing for a man worn around the neck."
Set 4: "Show me the metal instrument that we play by shaking it."
Set 5: "Show me the farm animal with short red fur that we can ride."
There are some points I wanted to add about the "following directions" activity. First, the app will automatically tally correct/incorrect responses. For kids who are used to the iPad, you may want to turn on "automatic paging." If a student taps a correct answer and nothing happens, I've noticed that they'll either keep tapping the picture, or try tapping the others pictures. Even though a sound indicates correct/incorrect responses, I've found that the kids always expect something to happen (i.e. move on to the next item). In this activity, you can record a student either repeating the direction, responding to the direction, or describing the target object. And my favorite thing about this activity. Notice in the screen below that the images are faded? Well, the student CANNOT respond to the direction until the entire direction is stated! Why do I love this? Well, I have a lot of impulsive/impatient kiddos on my caseload. They hear the first description and immediately begin tapping away at one of the pictures without hearing the entire description. This forces them to listen to the whole thing! You can always repeat the direction by pressing the replay button at the bottom of the screen.
Reinforcement:
After a certain number of correct responses (the number you chose in the settings), you are able to do the reinforcement activity of painting. The painter comes on the screen and asks if you'd like to paint now (you also have the option to skip):
Data Collection:
Like most speech-specific apps, Describe With Art has built-in data collection. At the end of your sessions, you can generate a report (like the one below), which you can print (if you have Air Print capabilities), or email to yourself for printing.
And there you have Describe With Art! Here's the breakdown:
Pros:
The Bottom Line:
Using the App:
![]() |
| Home Screen |
![]() |
| Settings screen |
The settings you can modify for this app are:
- User Alternate Count - For use with more than one player
- Enable Audio - Turns on/off audio instructions
- Show Instructions - Turns on/off written instructions
- Automatic Paging - When turned on, the app will move to the next item after a correct response.
- Random Paging - Changes the order of presentation of items.
- Enable Reward - Turn on/off Painting reward
- Award Counter - The number of correct responses needed for reward.
Once you hit "Start," you will be prompted to add/select students. You are able to add multiple students and track their data. After selecting your students, you will then select the activity/activities you wish to use for each selected student:
![]() |
| Activity Selection |
Describe it (Expressive Activity): The first set of activities is the expressive portion of the app. You can select from seven basic categories for describing:
- People
- Animals
- Objects
- Places
- Food
- Clothes
- Transportation
In the "Describe It" activity, students are shown a picture and asked to describe the picture. In the example picture below, the prompt given is "Describe this person." You can tap the record button and record the student's response. If a student has difficulty generating a response independently, there are question prompts that can be accessed by tapping the numbers below the picture.
The question prompts for describing people are:
- Who is it? How old is this person?
- Describe his/her height and weight.
- Describe his/her hair color, style, and length.
- Describe his/her face, skin, eyes, and nose.
- Describe his/her clothes.
Here's an example from "Places"
The question prompts for "places" are:
- What place is it?
- What do you see in this place?
- What can we do there?
Follow Directions (Receptive Activity): For this activity, you can choose from five sets of questions. The student is shown 4 images and asked to select one based on descriptors. Here are some examples (one from each set:
Set 1: "Show me the tall farm animal that has white and black spots and gives us milk."
Set 2: "Show me the garden tool that is sharp and used for trimming."
Set 3: "Show me the elegant piece of clothing for a man worn around the neck."
Set 5: "Show me the farm animal with short red fur that we can ride."
There are some points I wanted to add about the "following directions" activity. First, the app will automatically tally correct/incorrect responses. For kids who are used to the iPad, you may want to turn on "automatic paging." If a student taps a correct answer and nothing happens, I've noticed that they'll either keep tapping the picture, or try tapping the others pictures. Even though a sound indicates correct/incorrect responses, I've found that the kids always expect something to happen (i.e. move on to the next item). In this activity, you can record a student either repeating the direction, responding to the direction, or describing the target object. And my favorite thing about this activity. Notice in the screen below that the images are faded? Well, the student CANNOT respond to the direction until the entire direction is stated! Why do I love this? Well, I have a lot of impulsive/impatient kiddos on my caseload. They hear the first description and immediately begin tapping away at one of the pictures without hearing the entire description. This forces them to listen to the whole thing! You can always repeat the direction by pressing the replay button at the bottom of the screen.
Reinforcement:
After a certain number of correct responses (the number you chose in the settings), you are able to do the reinforcement activity of painting. The painter comes on the screen and asks if you'd like to paint now (you also have the option to skip):
![]() |
| Reinforcement introduction |
![]() |
| Reinforcement activity |
Data Collection:
Like most speech-specific apps, Describe With Art has built-in data collection. At the end of your sessions, you can generate a report (like the one below), which you can print (if you have Air Print capabilities), or email to yourself for printing.
Pros:
- The use of photographs. This is always a plus in my opinion! Photos are more easily relatable than drawings/symbols, especially for children with lower cognitive function.
- Receptive/Expressive components in the same app. This not only increases the versatility of the app, but also increases your ability to use the app with mixed groups of students.
- The question prompts in the "Describe It" activity are great for students who have difficulty formulating sentences/describing pictures on their own.
- As stated above, I love the fact that you need to listen to the entire direction before making a selection when using the "Following Directions" activity. Also, many of our students can follow simple directions and even simple multi-step directions. This is the only app I've come across that targets complex single step directions.
- Built-in reinforcement and data collection. The painting activity is fun and motivating for students, and who doesn't love data collection!
Changes I would make in an update:
- You can't change the settings without finishing your sessions. I would love it if there was a way to return to the home screen and change settings/add targets without finishing the session entirely.
- Some of the question prompts weren't 100% logical for each of the pictures. For example, when describing a picture of a desert, one of my students required the question prompts. He had difficulty coming up with a good response to the prompt "What can we do there?"
The Bottom Line:
Describe With Art is a great app for targeting understanding and using descriptions, building descriptive vocabulary, and following directions. You could also use this app to target articulation/voice/fluency carry-over, syntax/grammar, and WH- questions. You definitely get your money's worth with this app and it has proven to be both engaging and motivating for my students! You can find Describe With Art in the App Store. It sells for $9.99.
Labels:
apps
,
following directions
,
iPad
,
language
,
receptive language
,
Virtual Speech Center
Subscribe to:
Posts
(
Atom
)