Showing posts with label organization. Show all posts

Tuesday, July 30, 2013

New School Year, New Planner!

Disclaimer:  This post contains an affiliate link to Amazon.com for your convenience.

A little while ago on the blog's Facebook page, I mentioned that I was in the market for a new plan book and asked your suggestions.  I was a little amazed at how different we all are in our wants/needs with respect to a planner!  A few of you told me that you make your own planners.  Hmmm....Since I've never found a planner that I love, and since I'm fairly comfortable with creating things...I decided to go ahead and make one!


I started by figuring out which aspects of a standard planner I use and thinking about how I modified my planner.  When all was said and done, I ended up with a 55 page file!  I shared with a couple of friends and they suggested that I put it out there on TPT for those of you who may be interested.  Here's a rundown of my final version.

I wanted to make a few different options for covers...


Inside, I started with monthly calendar pages.  There are calendar pages for August 2013 through July 2014 plus one blank month in case your school year runs differently than mine!


Next, I wanted a way to visualize my groups for the day and add notes (If you're looking for a simple way to view your weekly schedule, check out one of my posts from last year).  I ended up with 2 pages/day...one for morning, one for afternoon.  I figured I could add my groups and laminate (or use those Dry Erase Pockets) then add in my planned activity with a dry erase marker.


I also wanted to include information on my students, especially their goal and objectives!  I added these student goal and data collection sheets:


You can find out more about the data collection sheets, and download them for free, HERE. What else do I need to keep track of?  How about contact information for parents, a contact log, a to do list, and notes section!  


This part might not make a ton of sense to anyone but me.  You see, I always insisted on buying a planner that had both a month view and a week view.  In the week view section, I would ignore the dates and draw boxes for each type of group (e.g., Preschool Inclusion, Kindergarten Artic, Preschool Language Pull-Out, etc.).  Then, I would add my planned activities to those boxes.  So rather than buy a planner with month/week views, I created these boxes for my planning:


And here's an example of the completed planner pages:


This planner ended up including everything I need in one spot!  However, I started thinking I might end up with a 6-inch binder!  So, I added extra covers if you'd like to keep the data sheets separate from your planning pages.  They coordinate with the plan book covers, but say "Data Book."  


Update:  (7/30/13, 8PM EST)

You asked, I listened!  I just went and updated the planner to include 15 more pages!  It's now at a whopping 70 pages!  Here's what I added per your suggestions:

A list for screenings and evaluations:

 Monthly Sheets for IEPs and Meetings.  (I left the last two columns blank so you can add your own headings...PW completed, Parent contacted, etc.):


Student attendance sheets.  Personally, I would circle the dates the child received therapy, put an X through
holidays and vacations and days absent.  You can use the notes section on the side to more clearly document (e.g. field trip, assembly, etc.)


If you're interested in finding out more about my planner, you can find it in my TPT store!  I will be giving away three copies of the planner.  You can enter to win using the Rafflecopter below!


PS, Let me know if I missed anything!  Also, if you purchase this item now, you'll be able to download all future updates. That means that next year, when I update the calendars, you won't need to pay for the item again.  Just update, print, and go!

Thursday, May 2, 2013

Don't Throw it Away! Wipes Containers

Today's "Don't Throw it Away" post features baby wipes containers.  This one might be a no-brainer - that you should be saving these for storage - but I had to share on the off-chance that someone out there is actually recycling their wipes containers!

(Click picture for link to product on Amazon)


What's not to love about wipes containers?  They're sturdy, have a removable lid, and come in a fairly standard size.  If you're lucky, you can find some that have a flat top.  The containers below are from the generic wipes that my district purchases for the preschool classrooms.  One teacher was kind enough to actually clean and save some containers for me (after she had saved some for herself as well)!  You can see they stack neatly on my shelves:


They're great for storing crayons, articulation cards, small toys/objects, etc.  In one of the boxes, I keep the materials that go with the following directions data sheets I use for screenings and baseline data (follow the link to download):


Want more ideas?  Check out Pinterest for inspiration!

Do you use empty wipes containers for storage?  What do you keep in them?

Thursday, April 11, 2013

Don't Throw it Away! Parmesan Cheese Containers


This is kind of a simple one, but I love parmesan cheese containers for storing small objects!  You could use them for sorting bears, stick pegs, lacing beads, etc.


The best thing about using these containers is the lid.  You can use the "sprinkle" part for placing pegs in.


You can use the larger opening for pouring small toys out.


Or you can unscrew the top and use the cap itself to hold the objects.


Do you use parmesan cheese containers?  What do you store in them?


*After posting this to Pinterest, another pinner commented that her daughter, who has a severe milk allergy, broke out when she attempted to use these containers to store toys.  If you have children with severe milk allergies, you may not want to use these containers!

Thursday, February 21, 2013

How I Organize TPT Materials

I've heard a lot of discussion lately about how to store those TPT packets, especially when you have a small space.  I figured I'd share how I organize my materials and maybe you'll find something that could work for you!  

For starters, I print and laminate the materials I plan on using (I do not always print the instruction sheets and I do not print sections that I think will be too difficult/too easy for my kids).  When I first started printing various materials from the internet (pre-Pinterest and pre-TPT), I used these large mailing envelopes.  I wrote the topic and contents on the front of the envelope.  


It may be difficult to see in this picture because they are the same color as the envelopes, but I use sheets of cardboard (from the bottom of water bottles) as dividers.  They are labeled with categories like Animals: Zoo, Animals: Farm, Books, Seasonal/Holiday, Articulation, Language Concepts, Games, etc.  I put them in these build-it-yourself shelving system I got at Target when they have their back-to-school college dorm items.  The one above is on top of my closet.  

Well, I ran out of envelopes, so I started using the gallon-size Ziplock bags.  I actually like these so much better because I can see what's inside!  Since I'm running out of space in the shelves above, I started putting some into theme-based binders.  You can place duct tape on one end of the Ziplock bag and hole-punch through it (I got this idea from Speech-Language Pirates). Here's a peek at my Thanksgiving binder:


I have more materials for some themes than for others.  For those themes that have a lot of materials, I use plastic storage containers like these:

(Click image to view on Amazon)

What about the materials you're using or about to use?

Here's how I keep the "What we're doing this week" items:


They're basically in a mail organizer I got from a local odd-lot store and I keep them on the shelf right behind my chair so I can just turn around and grab what I want.


And I store the "What's we'll be working on soon" in a dish-drainer organizer on another shelf.


In the silverware cup, I store my baggie of game pieces.  These are what I use for those open-ended game boards.  The baggie contains several game die, and game pawns.  I've been using those little rubber erasers as game pawns to make it more interesting for the kids.  I have transportation and animal themed erasers.


 I think that's about it!  How do you store your printed materials?

Tuesday, November 20, 2012

PECS: Organizing your Reinforcers

When I first started out, perhaps like many new SLPs, I was using picture symbols for just about everything.  I created communication books for lots of kids.  I taught the kids what to do with the book...without actually teaching them the foundations needed to use the book.

A few years ago, I found myself working in a classroom of students with severe special needs.  We all received a wonderful training from the district Assistive Technology specialist.  How many of you use the PECS (Picture Exchange Communication System) by Lori Frost and Andy Bondy?


There is a ton of information on the web about PECS and the Six Phases of PECS.  If you're not familiar with PECS, this page gives you a great rundown of the six phases.  Today I'm going to give you a couple of tips on organizing reinforcers.

You probably are aware of the basic concepts of "Picture Exchange" - a student gives a picture in exchange for a desired object.  Bondy and Frost first suggest that you find reinforcers (motivating toys/objects specific to each child).  This may not be shocking, but in my reinforcer assessment, I found that most of the students in the class had similar "likes."  I found myself using the same toys:  pop-tubes, wind-up toys, books, squishy balls, vehicles, etc.

For easy portability, here's what I did with my reinforcers.  I got a snap-top tote (this is the shoe-box size):


Filled it with my reinforcers:


And attached the picture symbols to the lid of the box with Velcro:


I made two boxes with different toys/activities so I could rotate the boxes and decrease boredom (for myself and the kids).  I used a mix of Mayer Johnson PCS, Pics for PECS, and photographs.  Basically, I took photographs for objects for which I couldn't find a good picture symbol.

Now you're ready to start working on Phase 1, Step 1 (Fully Assisted Exchange)!  What are your thoughts on this?  Would you like more information on the PECS method? If there is interest, I can start a PECS series.


Saturday, September 8, 2012

Speech Room Tour

I've loved seeing pictures on blogs and Facebook of everyone's speech room!  After switching schools, my room is finally ready for the little ones (preschoolers and kindergarteners) to start on Monday!  I thought I would share...

My Door Sign:

 
 (Yup, it's Pinterest inspired.  Here's the original pin from Personal Pizazz by Lindsey.)

View from the Door:


To the right of the door is my workspace.


(I don't actually have a desk, these cubbies came with the room and could not be moved.  I figured I'd rather use them as a workspace than add a desk to the room).   *Ignore the ancient computer.  It will be removed soon!


Across from my workspace:


 More cubbies!  I use these to store my therapy books, binders, etc.


To the left of the door is my closet:

Are you noticing more Pinspiration here?  On the closet, I have three pizza pans from the Dollar Store spray painted black and attached with Velcro.  I did this so I could use magnets on the door.  The pin I originally saw used oven burner covers.  On the other door is a file folder organizer pinned from Remarkable Home. I'm using it to store frequently used papers...language sample forms and data collection sheets.


Inside the Closet:


Because I know some of you were wondering!  ;)

To the Right of the Closet: 


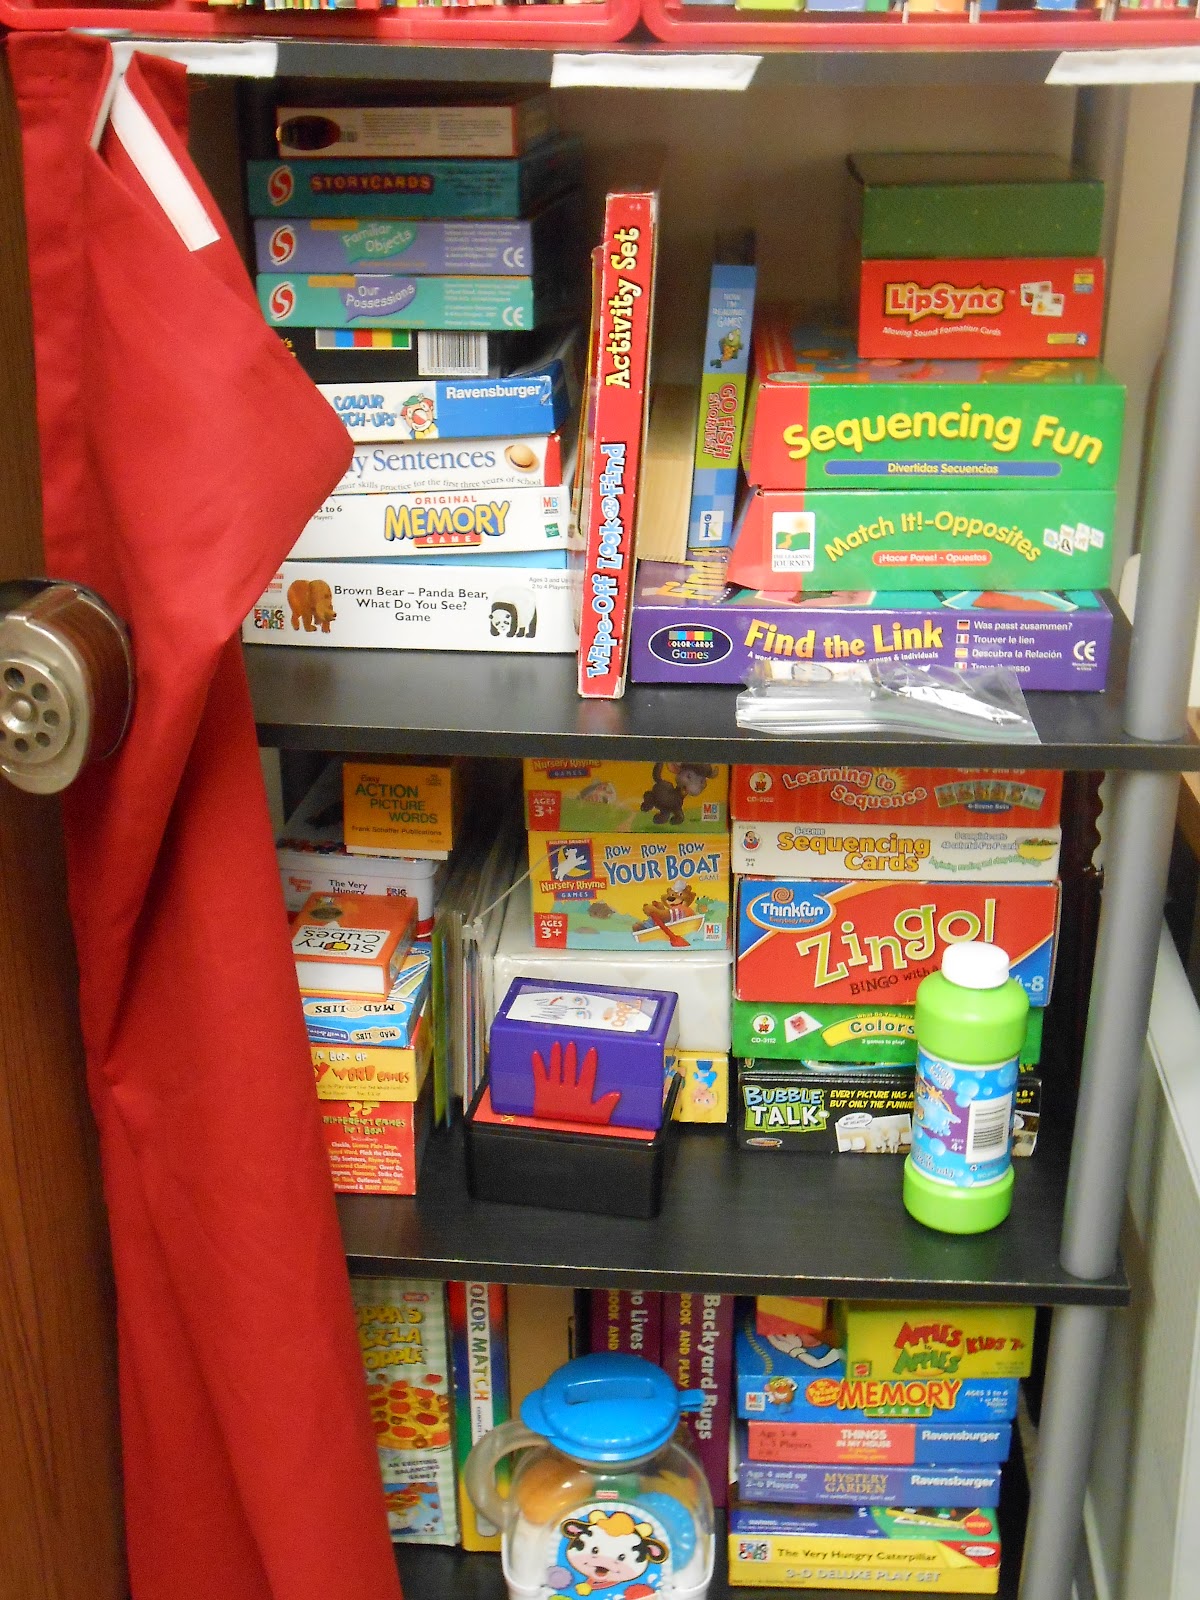
Cheap bookshelf I've had for a while...I covered the games and toys with a fabric curtain that attaches with Velcro.  Out of sight, out of mind!  The milk crates on top hold larger books that don't fit where I store my other books (see below).

To the Left of the Closet:
 

Another bookshelf for my testing materials.  I didn't really need the curtain here, (I don't typically have kids begging to participate in testing) but it looks less cluttered this way.


Some close-ups:
 

This is how I organize most of my children's books (They're in file cabinet drawers).  At my last school, I didn't have a great bookshelf for storing these types of books.  I started storing the books this way out of necessity.  I ended up liking it, so it stuck!

"Let's Talk" Sign:


Another Pinterest find!  Here's the original from Laura from Oh, How Pintearesting!

Schedule board:


Just a sample of how I organize my speech sessions.  With most of my expressive language/articulation kiddos, I start with the Word FLIPS (For Learning Intelligible Production of Speech) book from Super Duper, Inc.  I use it for 3-5 minutes at the start of my sessions.  It's a great warm-up for expressive/articulation activities.  Also, it a good preschool vocabulary building activity!


Bulletin Board:


Did you notice these?  I usually start the year with "Have You Filled a Bucket Today?" by Carol McCloud.  I scanned pages of the book to make the signs "Don't Be a Bucket Dipper!" and "Be a Friend ~ Fill a Bucket!"  I also found the cute little tin pail in the Dollar Spot at Target.  I'm going to be writing more about this book in an upcoming Guest Post on Let's Talk Speech-Language Pathology, so keep your eyes peeled!

Well, that's it!  A little peek inside my world!

What's your favorite, less than conventional, organizational trick?


PS, Did you see the "BEFORE" pictures on the Facebook page??? 
Related Posts Plugin for WordPress, Blogger...