Showing posts with label pinterest. Show all posts

Sunday, March 10, 2013

St. Paddy's Day Round-Up! (and a Sale)

St. Patrick's Day is fast approaching! So, it will be the theme of my therapy sessions this week.  What exactly will I be doing you may wonder?  Well here goes:


1.  "Something Green" - This is one of my all time favorite St. Patrick's Day activities!  It comes from the book "Listening for Basic Concepts All Year 'Round" (Linguisystems).  It's a story about two bears.  One wants to be in the St. Patrick's Day parade.  To do so, he must find something green to wear on his head.  He searches and finds a snake, olives, a pickle, and many other things before he finally finds a green hat.  The kids LOVE this story!


2.  St. Patrick's Day Preschool Language Pack - This is one of my TPT products.  I plan to use the Leprechaun Prepositions cards and All the Colors of the Rainbow in my language groups.  I will use the two open-ended activities (Leprechaun's Hat and Board Game) in my articulation groups.


3.  "There Was an Old Lady Who Swallowed a Clover!"  I'm combining some activities for this story!  I purchased the book companion from Crazy Speech World's TPT Store.  I will be using the sequencing mat and vocabulary cards while telling the story.  I will also use the mini-book so that students can take home for additional practice.  I printed THIS activity from Katie at Playing With Words 365 last year.  I typically use these with my youngest kids as they get into the story more when they get to feed the lady!


4.  St. Patrick's Day Pronouns TPT packet by MrsParker.  This activity targets his/her and he/she pronouns...a major need for the kids on my caseload!


Those are the activities that I'm using with my caseload.  If you're looking for more, or ideas for older kids, check out my St. Paddy's Day Pinterest Board.  There are a TON of resources and materials out there!


Finally, many of your favorite Speechie bloggers (myself included) will be hosting a St. Patrick's Day sale on TPT.  Everything in my store will be 15% off on March 17th!  Happy Shopping!!!


Are you planning St. Paddy's Day activities in your therapy room?  What activities are you using?


Tuesday, October 30, 2012

To Be (Free) or Not to Be (Free)

"Why do some SLPs provide materials for free and others charge?"


"How do you decide what materials you are going to charge for?"


"How do you decide how much to charge for your materials?"


"Why do some blogs have advertising and some do not?"


"Do you plan on reducing the number of freebies and start charging for all of your materials?"


These are some of the questions I've been asked lately.  I figured if many people were asking, probably more were wondering.  So, here goes:


I discovered the world of SLP blogs in January of this year, shortly after I discovered Pinterest.  I thought it was wonderful that so many creative SLPs were putting their ideas out there and sharing with the rest of us.  I loved the idea of an online community as well and I wanted in! (Check out this post from CC at If Only I Had Super Powers on  social/pragmatic skills for the blogging community).  In June, I had some extra time on my hands (Hello, Summer!) and figured that was the perfect time to start!  


Let me tell you, when I started, I had so much to learn (still do!)!  For instance, did you know that Mayer Johnson does not allow SLPs to create materials using Boardmaker PCS icons and share them free of charge in files not original to Boardmaker?  This means that they do NOT want you to create a PDF and share files made with their software to people who do not have Boardmaker.  Mayer Johnson prefers you to share activities created with Boardmaker on the Boardmaker Share site.  My first activity that I uploaded was created using Boardmaker PCS.  When I learned this, I had to scramble to get it down, remove the PCS, and add other graphics.  Interestingly, Mayer Johnson DOES allow you to sell materials that are made with less than 50 PCS!


by Scrappin Doodles
You see, people/companies that create graphics (e.g., Mayer Johnson, Scrappin Doodles, MelonHeadz) have "TERMS OF USE."  Some allow you to create educational materials with their graphics and give them out as freebies on a blog.  Others allow you to sell materials on TPT.  Others allow for either type of distribution.  Some graphics are free, but most are paid.  I try to grab free graphics when I can, but I typically pay $2.00-$7.00 for the graphics I use.  Also, some companies require you to purchase a license (in addition to the graphics) to distribute materials created with their graphics.


Now, I never got into this blogging venture to MAKE money, but I certainly did not get in it to LOSE money!  So, I added advertising to my page.  Well, most people don't click advertising links, so that was not paying for the graphics/licenses.  I then became an Amazon affiliate and added links to Amazon for my "Book of the Week."


That still doesn't cover the cost of graphics, so I decided to add a few paid items to my TPT store.  That's been more helpful! (Thank you to those of you who have purchased items!!!).  How do I decide which items to sell?  Typically those that are larger files and have taken a lot of time to create are the ones that I put up for a fee.  I like to keep costs low, so I don't charge more than a few dollars.  I do not have the "paid" seller account at TPT, so I actually get a little less than half of the total price of the item!


I think that covers all but the last question.  The answer to that one is "yes and no" - While I DO plan to add more paid items to my TPT store, I DO NOT plan to charge for all or most of the materials I post.

The bottom line is that blogging is a labor of love.  It takes a lot of time, effort, and sometimes money to create new materials to share (whether freebies or paid).  Offering materials free of charge or for a fee is a personal decision for all bloggers.  If bloggers decide to charge for an item, consider purchasing it if it meets your needs!  When a blogger offers a free of charge item, support that decision by posting a "thank you" comment.  Comments on blogs and Facebook pages are always welcome and appreciated and motivate us to keep doing what we're doing!

Hope that answers some of your questions and helps you understand (at least from my perspective) why some materials are free and others are not!


Thursday, October 4, 2012

Tissue Box Therapy!


It seems that every year, soon after school starts, so do the sniffles!  I have had sooo many kids sneeze, cough, and drip in my room this past week!  Between home and school, I go through more tissues in a year than I could possibly count!  Fortunately, tissue boxes are FANTASTIC for DIY therapy activities!


These are my favorite tissues to buy, mostly because the boxes are so versatile!  Here are just a few things I have made with this type of box:

Dice!  There are so many different things you can do with dice.  For example:

  • Emotion Dice:  Roll the dice and describe a situation that may make you feel the emotion you see.  For very young kids, roll the dice and make a face in the mirror like the one on the dice.


  • Graphing Dice:  I made this one to go along with a thematic unit on pets.  Each child in the group got to roll the dice and add a tally mark to the pet graph.  We then talked about the concepts of more/less and all/none.  You can grab a copy of the graph and dice images here.


  • Question Dice:  I use this one to make answering questions about a story a little more interesting.  Kids roll the dice and I give them a question based on the WH- word they roll (e.g., "Who" --> "Who was the main character of the story?").  Here's a copy of the doc I made for the words.


  • Category Dice:  Write different categories on each side of the dice.  Have students roll the dice and name as many members as they can.

  • Attribute Dice:  Label each side with the following attributes - Color, Size, Shape, Function, Category, and Association.  Pull out an object (e.g., apple).  Have students roll the dice and tell you something about the object based on what they rolled (e.g., Color - red, green, or yellow; Size - small; Shape - round; Function - you can eat it; Category - fruit; Association - like a pear).

*Hint:  When I make dice, I cut a small piece of cardboard from a cereal box (or other similar box) to cover the hole.  The, I wrap the tissue boxes like I'm wrapping a gift (I let the white side show, but you could leave it colorful).  Then I add the images/words I want to the sides and cover the whole thing with mailing tape.  I found that easier to work with than contact paper.


Grab box:  Leave the box as is, or you can use a square of felt with an X cut out of it to cover the hole in the tissue box.  Then you can use the box for any random drawing activity.  This is a great way to make any of your language and artic cards more interesting - place the cards in the box and kids draw one out when it's their turn.


Sorting boxes:  Place icons depicting your criteria on the sides of the boxes and have kids sort appropriately.  I used this activity with my preschoolers when we read "The Napping House."  We talked about the characters in the story and when they were awake/asleep.  Then we used the cards to work on subjective pronouns ("He is awake," "She is asleep").  Finally, we sorted the cards into the appropriate boxes.


Animal Eaters:  I have a few different boxes with open-mouthed animals.  The monkey is from the Kids Express Train music program for SLPs. It's for the song titled "Let's Eat."  We use it to reinforce the concepts in the song (e.g., "The monkey is eating the pizza") as well as present tense/negatives ("The monkey likes bananas" "The monkey does NOT like toast.").  The dog is a simple reinforcer activity from "More Clinician's Choice: Favorite Activities for Speech and Language" published by Communication Skill Builders.


Here's my son feeding the dog :)


If you're still not convinced that saving your tissue boxes is a great idea, here are some tissue box Pinterest finds:


How about this super simple crayon box idea from Money Saving Mom:


And I love these ideas from Crafty Kids with Carey Poppins:


I liked this one so much, it inspired me to create my own frog version:


It's painted with about 6 coats of green paint.  The eyes are egg carton cups, also painted with about 6 coats of green paint and topped with googly eyes.  The tongue is a ribbon, and I drew in the legs.  I thought this might be a cute variation to use with the Articulation Bugs that were posted by Brea at Let's Talk Speech-Language Pathology.


The Big Boxes!


If these are your preferred tissues, don't worry!  There are many ideas out there for them as well!


If you're on Pinterest, chances are you've seen these tissue box monsters from A Day With Lil Mama Stuart.  They're made from tissue boxes and egg cartons.  I've seen people pin these with the idea of using them as "Tattle Monsters" where children suppress the urge to tattle by writing their complaints and feeding them to the monsters.  I've also seen comments about using them to "eat" articulation cards for phrase and sentence level practice (e.g., "He is eating a lemon").  


Here's an adorable reindeer made from a tissue box and popcorn box (as seen on Playing with Words 365). You can use him to go along with Katie's printable book "The Very Hungry Reindeer."


Also the tissue box guitar/ukulele project seen on The Crafty Crow.  


How about these ideas from Simply Crafty (if you follow this link, there are many more ideas!).

Monster Feet
Mater
Rocket Ship


Do you use tissue boxes for DIY therapy activities?  If so, what are you using them for?

Saturday, September 8, 2012

Speech Room Tour

I've loved seeing pictures on blogs and Facebook of everyone's speech room!  After switching schools, my room is finally ready for the little ones (preschoolers and kindergarteners) to start on Monday!  I thought I would share...

My Door Sign:

 
 (Yup, it's Pinterest inspired.  Here's the original pin from Personal Pizazz by Lindsey.)

View from the Door:


To the right of the door is my workspace.


(I don't actually have a desk, these cubbies came with the room and could not be moved.  I figured I'd rather use them as a workspace than add a desk to the room).   *Ignore the ancient computer.  It will be removed soon!


Across from my workspace:


 More cubbies!  I use these to store my therapy books, binders, etc.


To the left of the door is my closet:

Are you noticing more Pinspiration here?  On the closet, I have three pizza pans from the Dollar Store spray painted black and attached with Velcro.  I did this so I could use magnets on the door.  The pin I originally saw used oven burner covers.  On the other door is a file folder organizer pinned from Remarkable Home. I'm using it to store frequently used papers...language sample forms and data collection sheets.


Inside the Closet:


Because I know some of you were wondering!  ;)

To the Right of the Closet: 


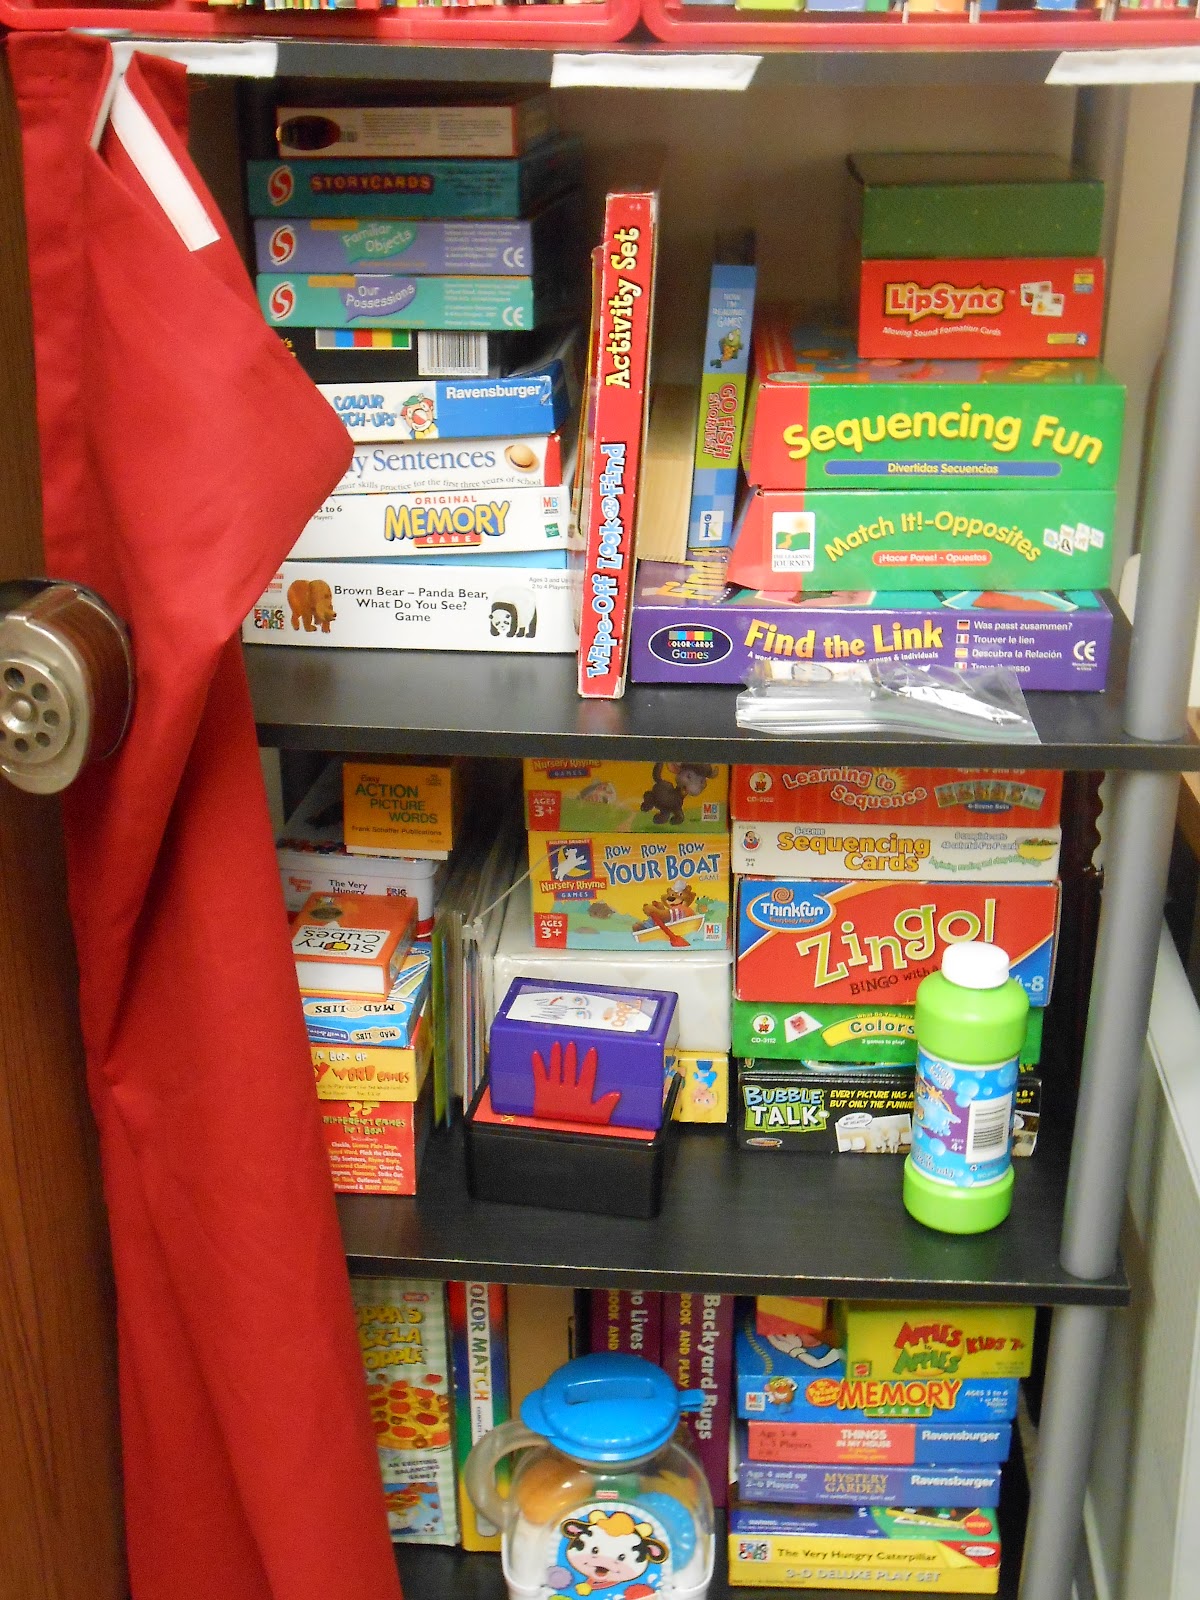
Cheap bookshelf I've had for a while...I covered the games and toys with a fabric curtain that attaches with Velcro.  Out of sight, out of mind!  The milk crates on top hold larger books that don't fit where I store my other books (see below).

To the Left of the Closet:
 

Another bookshelf for my testing materials.  I didn't really need the curtain here, (I don't typically have kids begging to participate in testing) but it looks less cluttered this way.


Some close-ups:
 

This is how I organize most of my children's books (They're in file cabinet drawers).  At my last school, I didn't have a great bookshelf for storing these types of books.  I started storing the books this way out of necessity.  I ended up liking it, so it stuck!

"Let's Talk" Sign:


Another Pinterest find!  Here's the original from Laura from Oh, How Pintearesting!

Schedule board:


Just a sample of how I organize my speech sessions.  With most of my expressive language/articulation kiddos, I start with the Word FLIPS (For Learning Intelligible Production of Speech) book from Super Duper, Inc.  I use it for 3-5 minutes at the start of my sessions.  It's a great warm-up for expressive/articulation activities.  Also, it a good preschool vocabulary building activity!


Bulletin Board:


Did you notice these?  I usually start the year with "Have You Filled a Bucket Today?" by Carol McCloud.  I scanned pages of the book to make the signs "Don't Be a Bucket Dipper!" and "Be a Friend ~ Fill a Bucket!"  I also found the cute little tin pail in the Dollar Spot at Target.  I'm going to be writing more about this book in an upcoming Guest Post on Let's Talk Speech-Language Pathology, so keep your eyes peeled!

Well, that's it!  A little peek inside my world!

What's your favorite, less than conventional, organizational trick?


PS, Did you see the "BEFORE" pictures on the Facebook page??? 
Related Posts Plugin for WordPress, Blogger...