Showing posts with label games. Show all posts

Friday, September 27, 2013

Super Duper Speech!

I was contacted recently by the nice folks at Super Duper about reviewing one of their products on the blog.  I was given a list of items to choose from and, not surprisingly, I already owned more than half of them!  While I'm waiting for the product I will be reviewing (you'll have to wait to find out what it is!), I figured I'd share some of my favorites!

I started looking around my room and was surprised at how often I saw the Super Duper logo! (You know, the two kids in the black oval).  So here are some of my favorites (in no particular order)...


Word FLIPS:
I've talked about this product before, but in case you missed it...FLIPS stands for "For Learning Intelligible Production of Speech."  I use this with most of my expressive language/articulation kiddos for 3-5 minutes at the start of just about every session. It's a great warm-up for expressive language/articulation activities. Also, it a good preschool vocabulary building activity! What I didn't mention the first time around is that it's great for kids with apraxia or other motor planning difficulties.  The book is divided into three sections and each section is printed with CV words, divided by sound (e.g., bee, boo, bye...tie, tea, toe...shoe, show, she, etc.).  You can make any combination of words you'd like.  My first copy of this book was so well loved that I ended up getting a second!  Now I have the opportunity to have kids sequence up to 6 CV sequences!


Lids 'n Lizards:
I bought this game some time last year and it has instantly become a favorite (of mine and of the students!).  With my little kids, I typically keep the magnetic pictures on top of the lids and have kids either name the picture, tell me about the picture, find a member of a specified category, or choose a picture to answer a WH question (e.g., What can you use to heat up your food?).  They absolutely LOVE finding the lizards!  I love that you can target /l/ in the middle of a language lesson!  I also love that you can grab other little animals at the dollar store (frogs, dinosaurs, etc.) to coordinate the game with classroom themes!  In addition, there is a list of game variations printed on the inside cover, making this game VERY versatile!


Grammar Gumballs:
This is another new-to-me product that I got at the end of the year.  I love that I can address multiple targets in the same session and the kids love the reinforcement of collecting bubble gum.  I've even used the game board within articulation sessions as reinforcement.


Fun Decks:
I have a bunch of these.  I store them in a drawer-box that is designed to hold CDs.  I found the box at an odd-lot type store and the fun decks fit perfectly! Also, did you know that many of the fun decks are available as apps?

(I couldn't find Voice Choice! on the website so I'm not sure if it's still available)

Voice Materials:
Last year I got my first ever student (pediatric) with a voice disorder.  I needed help (and materials) FAST! I ended up getting Voice Choice, Voice Adventures, and Martha Mouse & Baby Bear.  They have been a HUGE help for this kiddo!


Chipper Chats (etc.):
Whenever anyone asks me what my "Must Have" therapy materials are, I always answer with Artic Chipper Chat and WH Chipper Chat!  They are so versatile and can be used in many different ways!  I like to use WH Chipper Chat to take baseline data for answering questions!  Auditory Adventures is another great product for kids with comprehension and processing difficulty and Basic Concepts is wonderful for my youngest preschoolers!


These are another "Must Have!" If you're a new SLP, you need at least one of these (preferably one that comes with a CD!!).  I STILL use these books to make my own artic cards!!  In fact, I wrote a post about that, which you can read HERE.


Category Cut-Ups:
Last, I shared with you yesterday about how I introduced the EET to my preschoolers (you can find that HERE if you missed it).  After I wrote the post, I had an older student.  To introduce the concept of "groups" or "categories," I made some copies from this book, then we sorted the items (I didn't give him a whole lot of instruction other than to "make groups...as many as you need").  We used dry erase markers to draw circles on my table and give names to our groups!


And there you have some of my favorite things from Super Duper!  Now, while I'm waiting for the red box to show up at my door, Super Duper has given my fabulous readers (yes, that's YOU!) a special code that will earn you 30% off web orders!  When you check out enter the following code to receive the discount:

DHRMKSP8

Happy Shopping!  

PS, What's your favorite Super Duper product???


Tuesday, September 17, 2013

International Talk Like a Pirate Day

Disclaimer: This post contains affiliate links to Amazon.com for your convenience.

Avast ye mateys! Thursday is International Talk Like a Pirate Day...There really is a day for everything! I may be one of the few SLPs NOT doing anything in my speech room to commemorate this day. I just started seeing kids on Monday and am very busy collecting baseline data. Since we end the year later than other states, I typically reserve the "fun themes" (Pirates, Super Heroes, Dinosaurs, etc.) for the end of the year.


I digress! I figured I would share some Pirate themed activities, books, and games for those of you who do plan on celebrating!

Favorite Pirate Books:


I wrote a blog post about how I use "There Was an Old Pirate Who Swallowed a Fish."  There are free printables included.  You can find that post HERE.  I also wrote a post on Pirate Pete and a Pirate themed pronoun activity (FREE), which you can download HERE.

Favorite Pirate Games:


I know that Cariboo isn't necessarily a pirate game, but because there's a treasure chest, most of my students call it "The Pirate Game."  I have the old version and frequently swap out the images to target seasonal/thematic vocabulary, articulation, SVO sentence structure, etc.  Also, if you're looking for a fun way to increase trials in articulation practice, what could be more fun than counting out 100 gold doubloons and having students place them in a treasure chest bank for each correct trial?!?

Looking for more pirate themed activities?  Check out my Pirate Pinterest Board!

Have a swash-buckling great day!


PS, I haven't checked out Pirate Talk from Super Duper yet, but it looks amazing! ;)

Monday, September 2, 2013

New-ish TPT items

Over the summer, I added two new items to my TPT store, but never blogged about them!  I'm not going to go into a lot of detail, but figured I'd share them with you here.


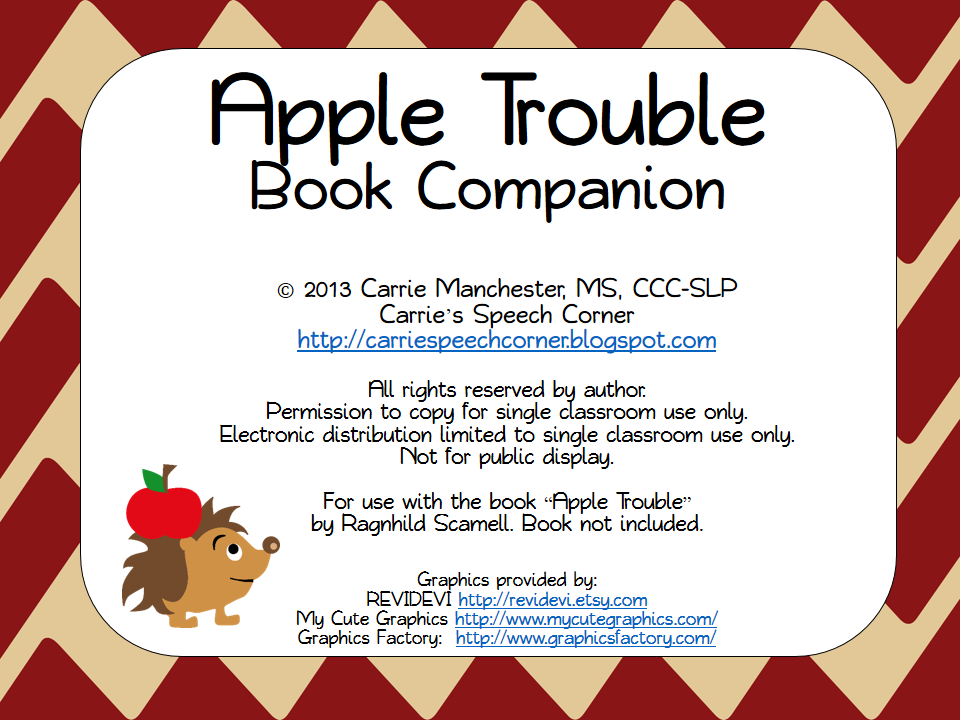
Apple Trouble Book Companion
Last year I wrote a Book of the Week post about "Apple Trouble!" by Ragnhild Scammel (you can read that post HERE).  It's one of my favorite books and I definitely use it every fall.  Since I do use it every year, I decided to create some new activities.  This packet contains story props as well as activities to target prepositions, negatives, vocabulary, and story retelling.  There is an open ended game board as well.


You can find this packet HERE.

20 Seasonal and Thematic Open Ended Game Boards
I love using thematic game boards with my articulation groups and to increase motivation for language tasks as well.  I decided to make game boards for each month of the year and for some of my favorite themes as well.


The seasonal games included are:

August: Back to School
September: Orchard Outing
October: Halloween Candy Hunt
November: Turkey Trot
December: Present Parade
January: Penguin’s Journey
February: Here Comes Spring (Groundhog)
March: Go for the Gold
April: April Showers
May: Buzzing Bumblebee
June: Follow the Fish
July: Fireworks Fun

Additional Themes:

Alphabet Blocks
Carnival Capers
Farm Animal Round-Up
Zoo-bilee
Treasure Hunt
Puppy Paradise
Mice-capades
Start Your Engines

You can find the board game packet HERE.

I hope to get to work on creating some new materials (including freebies) as soon as I start seeing kids!  What kind of materials are you looking for in the future?


Thursday, July 18, 2013

Love it and List it! Linky

Disclaimer:  Amazon affiliate links are included in this post for your convenience.

Hey everyone!  I'm going to be linking up with Jenna's Love it & List it over at Speech Room News.


This is going to be a regular monthly feature.  This month, Jenna is asking us to share our favorite games with you.  Here are some of my favorites that I haven't already blogged about:


Pesky Pirates:


We used "Pesky Pirates" as an open ended game in my therapy room.  Basically, you try to collect coins as you play and the player with the most coins at the end is the winner!  This game is a fun addition to your pirate theme!


Hullabaloo:


We all love Cranium's Cariboo, right?  Well Hullabaloo is pretty fun too!  You do need to have some space to play this game.  It comes with mats that go on the floor.  The mats all have specific attributes (color, shape, picture).  Each player starts on a purple mat (with a Cranium character) and once you press the button, they need to follow directions to move to another mat (e.g., "Spin to something you can eat," "Hop to a circle").  This game is great for following directions, learning attributes/categories, and listening comprehension.  The only downside to this game is that the speaker goes too fast.  I wish there was an option to slow it down or pause it.  Sometimes I just skip the speaker and give my own directions!


Zingo:


Zingo is a great game for preschool. As you may have guessed from the name, it's a twist on a bingo game.  There are two sides to each card.  The green has less complex vocabulary and the red, slightly more complex.  All of the cards consist of basic nouns (from what I remember, my game is at school!). The game is sturdy with plastic tiles that get placed in the red machine to start.  To "draw" tiles, kids must swipe the handle of the red machine back and forth (like an old fashioned credit card swiper).  They love it!


Snail's Pace Race:

Snail's Pace Race by Ravensburger has been one of my favorite therapy games since undergrad!  This game is probably a staple in many therapy rooms, but I figured I'd share if you're not familiar with it.  The coolest thing about this game is that the kids don't win/lose, the snails do!  We all have those groups that are competitive and want to win above all else, right?  Well this game eliminates the "sore loser syndrome"!


That's about all I can think of without actually being in my therapy room!  What are your favorite games to use in therapy?


PS, Thank you Jenna for hosting this linky!  

Thursday, May 30, 2013

Product Review: Tell Tales Fairy Tales by Blue Orange Games

Back to that box from the other day...


The other day, I posted a review of Spot It Jr! Animals by  Blue Orange Games (see my review HERE).  Today I'm going to share my experiences with  Tell Tale Fairy Tales.  This game is a variation of the original game - Tell Tale.


By the way, Tell Tale Fairy Tales has won the following awards:

  • Dr. Toy 10 Best Creative Products
  • Play Advances Language Award
  • The National Parenting Center

Like the games in the Spot It! family, this game comes in a convenient tin for storage.  And again, I wanted to include this part of the box in the picture so that you can see that this game is recommended for ages 5 and up, can be played with 1 to 8 players, and takes approximately 20 minutes to play.


This game contains 60 double sided cards with 120 total illustrations.  The game instructions include four different ways to play:


  1. Storyboard:  Everyone takes 6 cards and places them in the order they would like to tell their own story.  Players take turns improvising a story based on the 6 images on their cards.  ALTERNATE:  Play in teams of 2.  Make up the storyboard together and then tell the story taking turns.  When the first team is finished, the next team tells their story.
  2. Round 'N Round:  Everyone takes 4 cards and looks at their images.  The first player chooses one card and places it on the table.  Using this card as a starting point, s/he begins a story.  The next player chooses one of his/her cards, places it next to the first card and adds to the group story.  The game continues until the last card is used.  ALTERNATE:  Play in teams of two.  Each team takes 6 cards.  Teams take turns telling their communal stories.  Storytellers within each team alternate as they add on to the story.
  3. Showtime:  Everyone takes 6 cards.  Without peeking, players place the cards face-down in a pile in front of them.  One player begins a story by flipping over the first card.  They continue flipping over all cards to add to the story until all cards have been used.  The next player begins a new story, and so on.  ALTERNATE:  Play in teams of two.  One team weaves the story together, alternating between team members (one team member starts with the first card, the other adds on to the story with the second card).  Then it's the next team's turn.
  4. The Stack:  Shuffle the cards and place 24 of them in a pile in the center of the table.  The first player takes one card and begins a story.  Players take turns picking one card from the stack and adding on to the story until no cards remain in the central pile.
I don't think the folks at Blue Orange set out to make a "therapy game" with Tell Tale and Tell Tale Fairy Tales, but boy did they ever!  The therapy implications with this game are endless!  Here are just a few:

  • Narrative development:  You can teach story grammar elements (characters, setting, problem, solution) and have students make sure to include these elements in their stories.
  • Sequencing:  This game is great for sequencing story events and for teaching words like "First," "Next," "Then," and "Finally."
  • Sentence formulation/MLU:  You can't tell a story without using full and complete sentences.  This game provides a motivating, naturalistic way to target sentence formulation.
  • Grammar/Syntax:  This goes hand in hand with sentence formulation!
  • Descriptive language/Colorful sentences/Vocabulary:  Fairy tales are a great way to add "color" or description to otherwise simple (aka boring) sentences.
  • Written language:  Students can write out their stories using introduction, story, conclusion. 
  • Topic Maintenance and Perspective Taking:  Students creating a story need to stay on topic and to make sure their listeners have sufficient background information to follow the story.
  • Carryover activities for articulation and practicing voice and fluency strategies.
  • Pragmatic language/Social skills:  Form many of the variations, students need to work together to create a story.

I first used this game with a group of preschoolers (all of whom are five years old and going to kindergarten in the fall).  I placed a bunch of the cards in the center of the table and told the students that we would be using the cards to write our own story.  I gave them a few minutes to look at the cards and told them that they should remember to (1) keep the characters consistent throughout the story - you can add new ones, but don't let the others disappear; (2) add to the story without changing the setting; (3) link to the parts of the story that have already been told.


This is the story they came up with:
Once upon a time, there was a queen in a castle.  A ghost was in the castle.  She was afraid.  The cat came and fight the ghost.  The cat went back to the forest.  He went into the cave.  There was a dragon in the cave.  The dragon had a princess tied up.  The king asked the cat to save her.  The cat used a sword to fight the dragon.  The cat needed help from the knight.  The knight called a genie.  The genie came on his magic carpet.  He had a map.  The map showed a pirate ship.  Then the sun came out and there was a rainbow.  The cat and genie got the dragon and played a song.  The cat gave flowers to the princess.   She used the key to start the car.  The End.
During the first session, I transcribed the story as stated.  I did work on keeping them on topic and keeping the story consistent.  During my next session, we working on adding adjectives and more descriptive words, correcting grammar, and basically editing the story.  This is their final result:
Once upon a time, there was a queen in a castle.  A ghost haunted the castle.  The queen was very afraid.  The brave cat came and fought the ghost.  Then the cat went back to the forest and into a cave.  There was a fire-breathing dragon in the cave.  The dragon he had captured a princess and tied her up.  The king asked the cat to save the princess.  The cat tried to use his sword to fight the dragon, but he needed help from the knight.  The knight called a genie for help.  The genie came to the rescue on his magic carpet.  He had a map that showed a pirate ship.  The cat and genie defeated the dragon and the cat played a song on a harp.  The cat picked some beautiful flowers for the princess.   She used her key to start the car and drive everyone back to the castle.  Finally, the sun came out and a rainbow appeared in the sky.   The End.
Later on, I used this game with a first grade student.  First, I set out 9 cards on the table:


I asked him to think about the order that he wanted to use, think about the characters, the setting, the problem, and the solution.  For him, we used the app Scribble Press ($3.99 in iTunes) to illustrate his story.  With Scribble Press, you can use your iPad's camera function to add pictures to book pages.  We took pictures of the individual cards and groups of cards.  Here are some sample pages:


In the screenshot above, you can see that we have already added the pictures and words.  You can also use markers and stickers to add to the pages.  Once you have finished your book, you can "publish" to iBooks and also email to parents.  With this student, I emailed the story to his mother so that the student could tell the story to his family members as practice.

*We fixed my typo before emailing to his mom!

If you're curious, here's his story:
The Queen and the Knight
Once upon a time, there was a nice queen who lived in a castle.  Then a dragon came and took the queen to a magic forest.  In the forest, the queen saw a magic wand, a red potion, a green potion, and a blue potion.  Then a knight came and fought the dragon. The magic wand touched the knight and turned him into a baby.  The queen escaped the dragon and fed the baby the red potion and he turned back into a knight.  Then the queen and the knight had a wedding and got married. And they lived happily ever after! The end.
We didn't have time in our session to edit or add to his story, but we might just do that during our next session!

One more variation I used...I had a group of 4 reluctant speakers.  After giving them the run-down, I gave them each three cards.  Each child was told that they needed to use their cards (one at a time) to add to the story.  Then I gave incentives to the kids who got rid of their cards first!  This particular group always fights over who gets to be the line-leader, so the first student to get rid of all their cards was the line-leader back to class.  The second got to turn off the light when we left the room (these don't sound like major incentives, but for these kiddos, they are!), and each student got a sticker when they turned in their last card!  It worked like a charm!  They all participated and only rarely tried to give me a totally off-topic story addition!  I didn't get a chance to write down their story to share with you, but it was a thrilling tale of pirates, treasure, and a genie in a golden lamp!

I love this game for developing not only language skills, but also imagination!  I do not have the original Tell Tale game, but if I did, I would bet that you could combine cards from both games to create even more stories!  My only "problem" with this game is that the game cards are double sided.  There were times that we were searching for an image ("I know I saw it somewhere!"), only to find it on the back of another card we were using.  Also, the directions for some of the game variations call for you to place cards "face-down." Since both sides have illustrations, there really isn't a "face-down."  For my kids, I would prefer one sided cards with the logo on the other side.

Well, there you have Tell Tales Fairy Tales!  I hope you enjoyed the stories that were created using this game...we sure had fun writing them!  If you are interested in purchasing this game, you can do so through the Blue Orange website.  In addition, I was able to find both of the Tell Tale of the games on Amazon.com (affiliate links are below).

What do you think of this game?  What would you use it to target?


Tell Tale and Tell Tale Fairy Tales (plus some other popular games from Blue Orange):


Disclaimer:  Blue Orange provided Tell Tale Fairy Tales for the purposes of this review.  However, the opinions expressed are mine alone.

Monday, May 27, 2013

Product Review: Spot It Jr! - Animals by Blue Orange Games

If you follow me on Facebook, you might have seen this picture that I posted:


I asked what you thought might be in the boxes and many of you guessed that I was receiving games to review for you.  You were right!  The top box contained two fun games from Blue Orange - Tell Tale Fairy Tales and Spot It Jr! Animals.  Today I'm going to share my experiences with Spot it Jr! Animals.  This game is a variation of the popular Spot It!, which is recommended for ages 7 and up.  You can try out the original Spot It! online HERE to get a better idea of how the game works.


As you can see, the game comes in a convenient tin for storage.  I wanted to include this part of the box in the picture so that you can see that this game is recommended for ages 4 and up, can be played with 2 to 6 players, and takes approximately 15 minutes to play.


What else should you know?  This game has 31 cards that each have 6 different animals of different sizes.  There are 30 different animals in all.  There is only ONE animal match between any two cards. The object of the game is to Spot that match as fast as you can!


The game directions provide FIVE different ways to play:


  1. Twins:  Each player takes turns drawing two cards from a pile (face down in the center of the table).  Once the cards are turned over, all players try to find the match.  Whoever finds the match gets the cards.  The person with the most at the end is the winner.
  2. The Tower:  (see below)
  3. The Well:  One card is put face up in the center of the table, shuffle and deal the rest to the players.  At the same time, players turn over their piles and look at the top card.  The first to find a match places it on top of the center pile and play continues.  The first to run out of cards is the winner.  
  4. Hot Potato:  Deal one card face down to each player.  Players turn over their cards at the same time, holding it flat in an open palm.  If you find a match on another player's card, call it out and place your card face up on that player's card.  Repeat until one player has all the cards.  Continue with another round.  The player with the least amount of cards at the end of the final round is the winner.
  5. Triplet:  Place all cards face down in a pile.  One player takes the first 9 cards and places them face-up 3x3 (like a tic-tac-toe board).  At the same time, players try to find a match on any THREE cards.  The player calls out the animals and gets to keep the cards.  Those three cards are replaced and another round begins.  The person with the most cards at the end is the winner.


The day I received the packages, I just happened to be home with a sick little boy.  As soon as I opened the box, he perked right up and wanted to play "Nemo."  By the way, most of the preschoolers with whom I played this game thought it was "The Nemo Game" at first.  I opened the package and read the instructions and we got right to it!  We played "The Tower" version.

He doesn't look very sick, does he? :)

To play "The Tower," you shuffle the cards, deal one to each player, and place the remainder face down in the center of the table.  You flip over the top card and the first one to shout out their match gets the card from the middle. Keep playing until the cards in the middle are gone. The player with the most cards at the end of the game is the winner!  We played with two players and my son is three years old.  Even though the game was recommended for ages 4 and up, he did fine with it, as did my three year old preschoolers at work.  It might have taken a bit longer for the little guys to find their matches than the older kids, but they still enjoyed the game!  Surprisingly, I occasionally found myself having difficulty finding matches!  I think this is because the animals vary in both size and position from card to card.

After a very successful test-run at home, I brought the game to school to use in therapy.  Because all of my students are on Individualized Education Programs (IEPs), I decided to stick with "The Tower," because I thought it would be the easiest variation for the kids.  Here's a group of four students looking for their matches:


And a group of two students...This little guy had to touch each picture and compare to his card before finding his matches.


I wanted to mention that I found that my kids with decreased attention really needed extra time to find the matches.  If you have a child with reduced attention in a group of other children with better attention, you might want to play as a turn-taking game.  At the end of one session, I had one child (with fairly reduced attention) who ended the game with only two matches - and I made them all take turns for their first attempt!

You may be wondering how this game relates to speech and language therapy?  Well, we used it to target:

  • Vocabulary:  animal names
  • Classification:  ocean animal, zoo animal, forest animal, etc.
  • Attributes:  color, size, legs/wings, etc.
  • Superlatives:  e.g., "My biggest animal is the octopus"
  • Receptive language:  e.g., Point to the smallest animal, Point to an animal that lives in the water, etc.
  • Confrontation naming skills:  Before we started, I quickly flipped through all the cards and had students name the biggest animal on each)
  • WHO questions:  Who has a big octopus?, Who has an animal that can fly?
  • WHICH questions:  Which animal has the most legs?  Which animal runs the fastest?
  • Comparing/Contrasting:  How are an octopus and a dolphin alike?  How are they different
  • Articulation of multisyllable words:  Spot it Jr. Animals features animals like alligator, octopus, gorilla, grasshopper, etc.  Perfect for sound sequencing skills!
  • Articulation carryover:  Not sure why, but many animal names contain common tricky phonemes /l/, /s/ and /s/ blends, /f/, /k/, /r/, etc.

I played this game in groups of 2-5 people (sometimes I played with the kids).  I used it with ages 3-6 with good success.  No one was bored and everyone had fun!  I found that it took a little over 15 minutes for some groups, but others were able to play twice in a thirty minute therapy session.  It probably took longer because we first reviewed the vocabulary and then added speech/language targets (see above).

The Bottom Line:
Overall, I thought this game was GREAT for therapy sessions!  You can target so much in that little round tin!  Matching is a simple concept and most kids can pick up on the idea pretty quickly, so it doesn't require a lot of pre-teaching.  Also, because of the versatility of this game, you can easily use it with mixed groups and target multiple objectives within the same session!

If you are interested in purchasing this game, you can do so through the Blue Orange website.  In addition, I was able to find all of the games on Amazon.com (affiliate links are below).

What do you think of this game?  What would you use it to target?


Spot It Jr! Animals and other games from the Spot It! series:  


Disclaimer:  Blue Orange provided Spot It Jr! Animals for the purposes of this review.  However, the opinions expressed are mine alone.

Friday, April 12, 2013

Book of the Week: "Little Cloud"

My book of the week for you this week is one of my all time favorites - "Little Cloud" by Eric Carle.


"Little Cloud" is somewhat similar to "It Looked Like Spilt Milk" by Charles G. Shaw in that both stories feature cloud shapes.  The main difference is that, in "Little Cloud," you know from the beginning that the shapes are created by a cloud. Whereas in "It Looked Like Spilt Milk," you don't.  
Because of the similarity between the two books, the extension activities I'm going to share could easily be adapted to either story.  

1.  Cloud Shapes:  I used the die-cut machine in my last school to create various shapes out of white paper.  I made sure to include all of the shapes from the story in addition to other shapes.  After we read the story, we work on naming the other cloud shapes.  You can use the shapes for a simple naming task, category naming, descriptions, articulation etc.  You can also lay them on the floor and work on receptive language (find a kind of food, find something that swims, etc.).  Since there's a line in the book "A sheep and a cloud sometimes look alike," I took advantage of this and asked the students to compare two of the objects (e.g., shark and octopus, duck and sheep, plane and butterfly, etc.)


2.  Cloud Sorting:  I didn't take a picture of this, but once my groups named all of the cloud shapes we sorted into shapes that were in the book vs. shapes that were not in the book.  I've done this using 2 hula hoops, placing the book in one hoop so that all of the shapes featured in the book go in the same hoop.  I've also done a graph using masking tape (make a T-shape with the tape and sort the shapes).

3.  Matching/Lotto Game:  I created this game in Boardmaker (and they don't allow me to share with you, so sorry about that!).  Basically, I used black and white images on cells with a blue background.  I then created the little cards in the same manner, adding "lose a turn" and "try again" cards.  After printing and laminated, I realized that I should have made the game boards and draw cards in different colors so the contrast was easier to see, but the kids still liked the game and it was a great way to reinforce the vocabulary and work on increasing MLU (e.g., "I picked a shark cloud").


4.  Play Dough Clouds:  When I can find it, I like to give kids a piece of white play dough on laminated sheets of blue construction paper.  Then they smoosh the play dough and make a shape in their clouds.

5.  Cornstarch Clouds:  I can no longer use food items in my therapy sessions, but when I could, I sometimes mixed cornstarch and water in a large tray and have the kids draw shapes in the "clouds" by using their fingers.  For kids with sensory issues, I also place some in a plastic ziplock bag (you may want to double bag).  They can use their fingers through the baggie.

6.  Free Printable Story Patterns:  After I originally published this post, Alicia from Chalk Talk Speech Therapy directed me to these free printable story patterns from KizClub.  Thank you Alicia!!!

Do you use either of these books in therapy?  What's your favorite activity to accompany the book?


Friday, February 1, 2013

Lunch Tray Listening {FREEBIE}

In honor of the launch of the all-new Speechie Freebies blog, I'm so excited to share a {FREEBIE} with you!  Lunch Tray Listening is an activity designed to work on increasing a student's ability to provide and follow directions.  


It comes with lunch tray mats:

2.


and food items...


There are two variations of game play:  


1.  Barrier Game:  To be used with two students or two teams of students.  Give each team  a copy of the lunch tray and a copy of the food items.  Place a barrier or partition between the teams.  Have one team create a scene using the pieces.  That team then provides directions (as detailed as possible) to the other team.  Once finished, the barrier is removed.  You can use this opportunity to discuss what worked/what didn’t and help students formulate improved directives.  

2.  Following Directions:  Print enough copies for each student in your group to have their own set of materials.  Have students complete directives (e.g., “Put the apple in the round opening on the tray” or “Place the milk carton above the tray and the fork below the tray.”).  

Sample directions are included in the download.  Here are some samples:

1-Step
  • Put the sandwich in the largest tray.
  • Put the milk carton above the tray.
  • Put the cookie in the round opening.


2-Step:
  • Find a vegetable and put it in the top right opening. 
  • Place the milk carton above the tray and the knife below the tray. 
  • Place the sandwich in the largest opening and the fork on top of it. 


You can download this freebie HERE.  Let me know what you think!


Related Posts Plugin for WordPress, Blogger...